
Post by david on Jan 23, 2008 23:54:34 GMT 1
Hi Chaps,
Following lengthy modifications to the deck camber, I'm now even further behind because of work on the gunnls, gutters and belt armour etc. Hachette/Amati have not given nearly as much thought to the hull as they have the many splendidly detailed superstructure elements. This is no doubt due in part to the need to give a strong support for the railings. The upper hull above and including the belt armour is in places sculpturally complex especially the curves at both ends of the belt armour, and the forward anchor guides, which are not scalloped sufficiently deeply on the resin part. So in attempting to make modifications in one area, it inevitably affects what needs to be done in another.
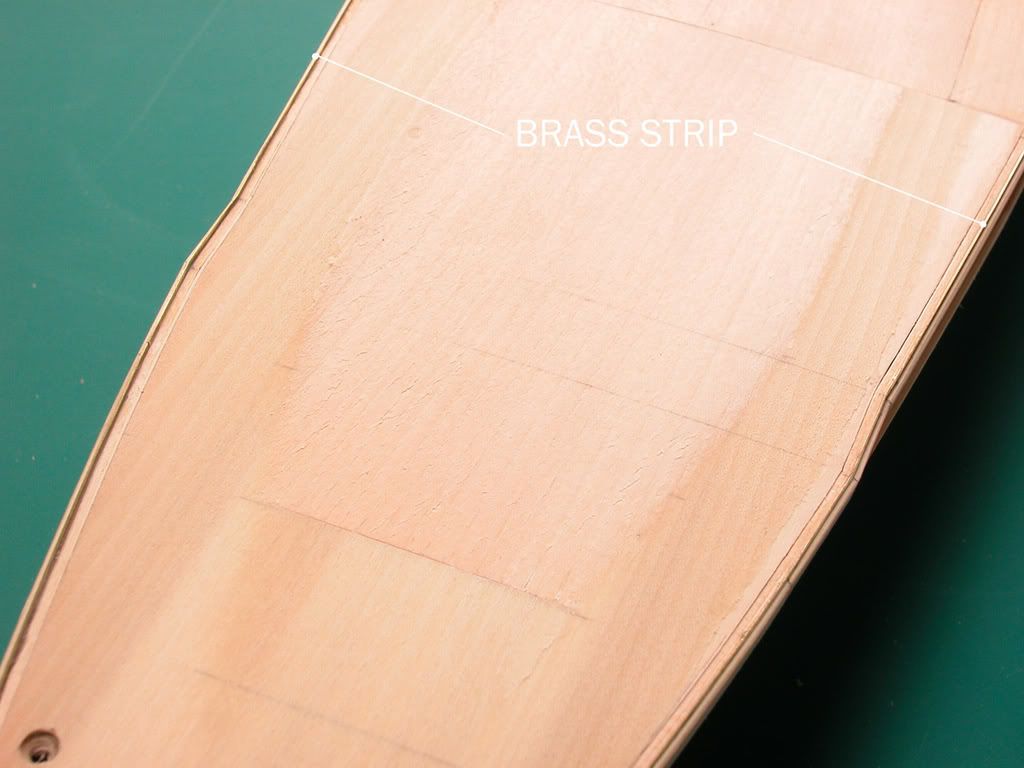
My plan is to use thin brass strip to make the gunnls for both greater accuracy and strength. I ought to say first that I cut back the tops of all the central ribs as well as narrowing the beam of the deck. As you can see from pictures this is still a work in progress but it’s at a good point to see the various elements in the raw. The diagram gives an idea of the various layers in cross-section.

Because I embarked upon these modifications late in the build, I had to strip back planks and beams in a sometimes rather sloppy fashion; clearly this would have been easier if I’d planned this work at the outset.
The main benefit of putting in a brass strip, aside from accuracy, is that it gives a very solid attachment point to the railings which can be soldered or Araldited into place, as well as sunk into the 2mm sidewall.
I hope that the diagram and photos are fairly self explanatory, but I’ll be adding to this thread when I’ve started the second planking, including a description of a quick and simple way to accurately bevel a 1mm strip of lime.
David.

The next picture shows the first outer layer of bevelled 1mm strips.

This close-up shows a row of holes in the brass strip designed to allow the Araldite to get a better grip.


Following lengthy modifications to the deck camber, I'm now even further behind because of work on the gunnls, gutters and belt armour etc. Hachette/Amati have not given nearly as much thought to the hull as they have the many splendidly detailed superstructure elements. This is no doubt due in part to the need to give a strong support for the railings. The upper hull above and including the belt armour is in places sculpturally complex especially the curves at both ends of the belt armour, and the forward anchor guides, which are not scalloped sufficiently deeply on the resin part. So in attempting to make modifications in one area, it inevitably affects what needs to be done in another.
My plan is to use thin brass strip to make the gunnls for both greater accuracy and strength. I ought to say first that I cut back the tops of all the central ribs as well as narrowing the beam of the deck. As you can see from pictures this is still a work in progress but it’s at a good point to see the various elements in the raw. The diagram gives an idea of the various layers in cross-section.
Because I embarked upon these modifications late in the build, I had to strip back planks and beams in a sometimes rather sloppy fashion; clearly this would have been easier if I’d planned this work at the outset.
The main benefit of putting in a brass strip, aside from accuracy, is that it gives a very solid attachment point to the railings which can be soldered or Araldited into place, as well as sunk into the 2mm sidewall.
I hope that the diagram and photos are fairly self explanatory, but I’ll be adding to this thread when I’ve started the second planking, including a description of a quick and simple way to accurately bevel a 1mm strip of lime.
David.
The next picture shows the first outer layer of bevelled 1mm strips.
This close-up shows a row of holes in the brass strip designed to allow the Araldite to get a better grip.