|
|
Post by swanrail on Feb 6, 2008 23:10:06 GMT 1
Having now completed the second planking at the stern, I tried the new part and to my surprise, found that it fitted perfectly!!! Part 63 does finish some 2mm inside the part 70, but I now find that this is intentional. Looking at Markus's model stern, he seems to have a filler plank covering the edges of the plywood, so I have done the same. My stern now has the filler part fitted (thanks to the good old kettle steamer and gash wood from my other models and all looks good. I have deliberately left the filler piece too high, in the hope that it can form the waterway plank for when I fit my new deck technique. Pictures below:: 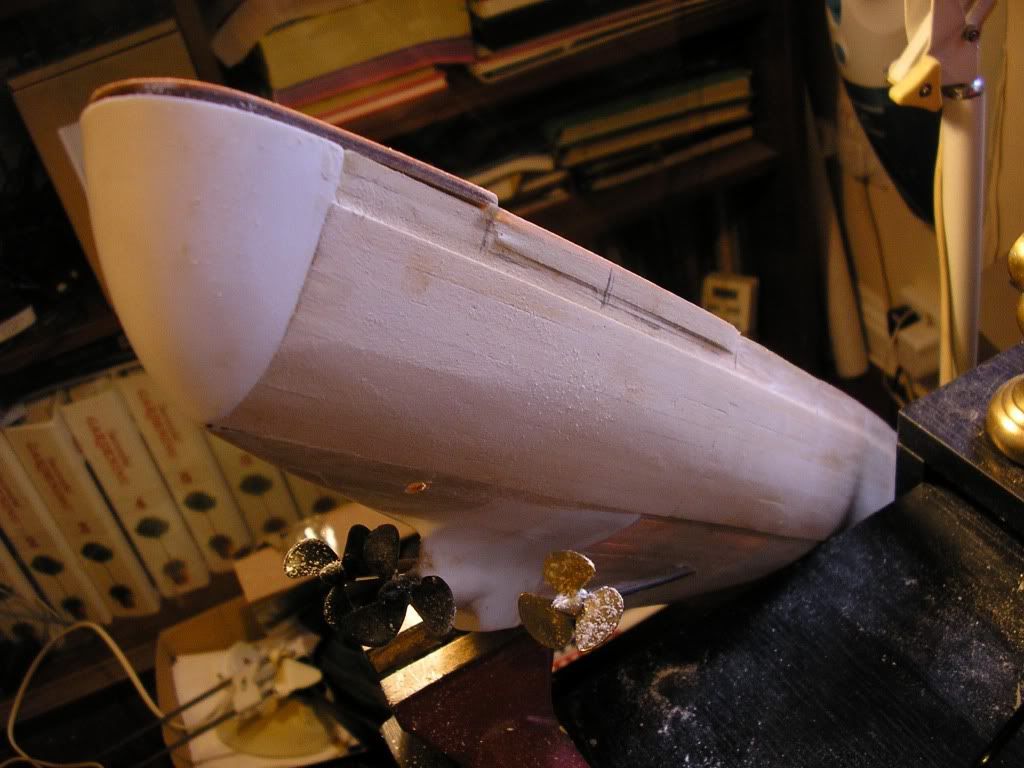 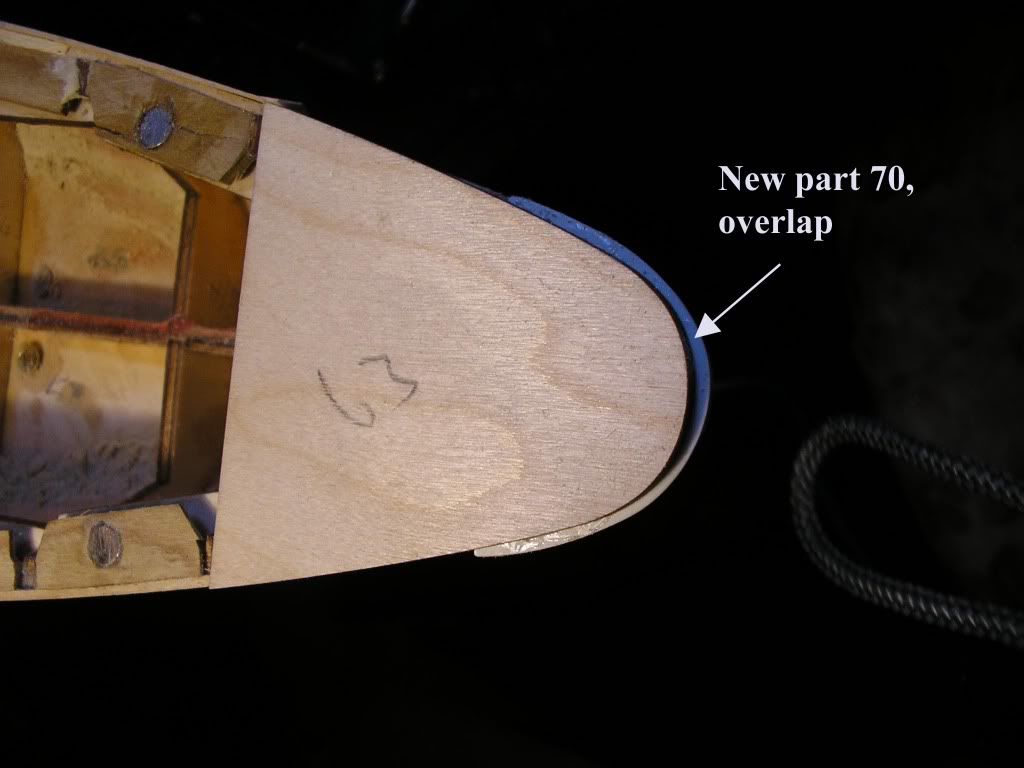 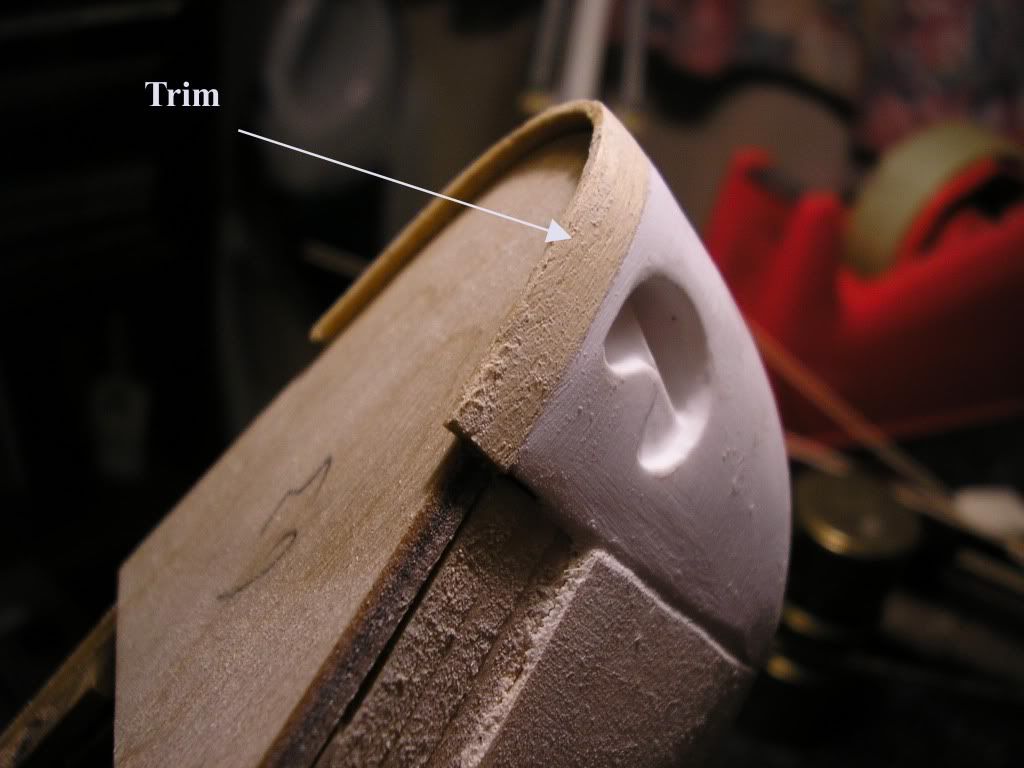 Note: The picture above shows new part 70 with the anchor recess as supplied. I later modified this, as can be seen in the next post. |
|
|
|
Post by swanrail on Feb 6, 2008 23:25:02 GMT 1
As you are aware, following on from our German friends outcry at the anchor recess being wrongly sited, Hachette produced a new part 70. This I fitted, and was quite happy with, until I got issue 44. In there, on page 132, is a very good picture of the stern, which shows errors in the new part 70. The lower fluke recess point is slightly below the row of portholes, and the top of the recess is level with the deck. Part 70 is some 5mm too low!!! I have therefore decided to right the wrong on my model, which would have been easy if I had not araldited the part into place! However, fortune favours the brave, so this is what I did: 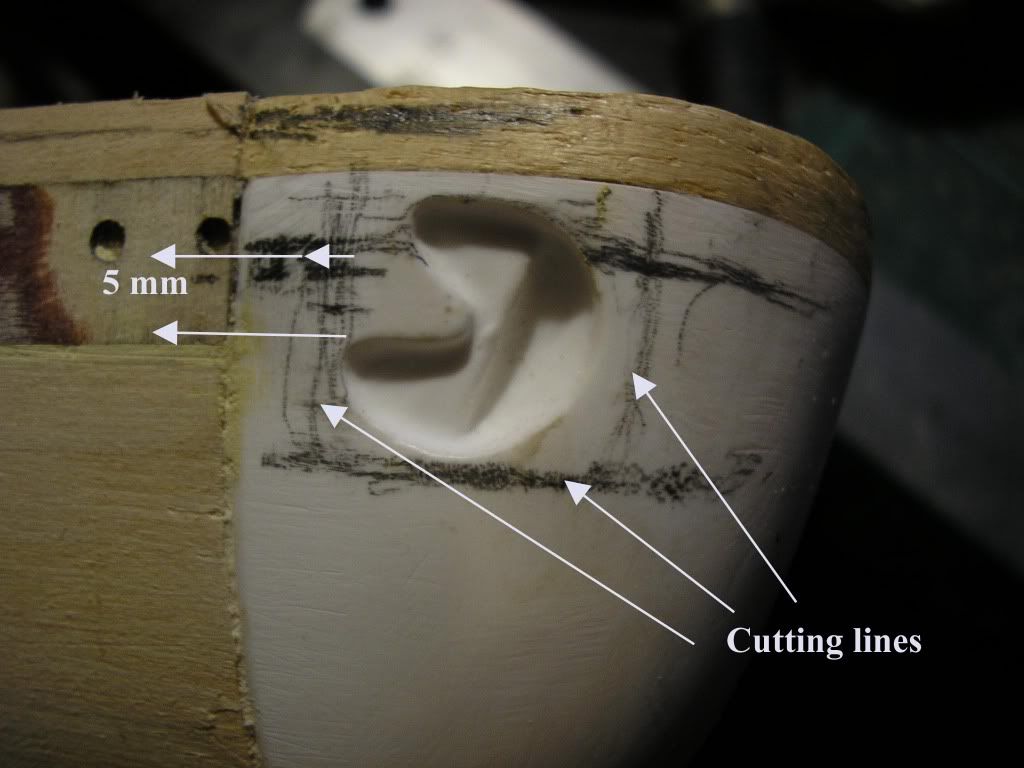 This shows as built, with markings on my suggested course of action, I cut along the lines marked and removed the segment, which was then trimmed down to leave a block containing the recess, the remainder was fitted back into original pace using wood planks as fillers for the sawcuts. 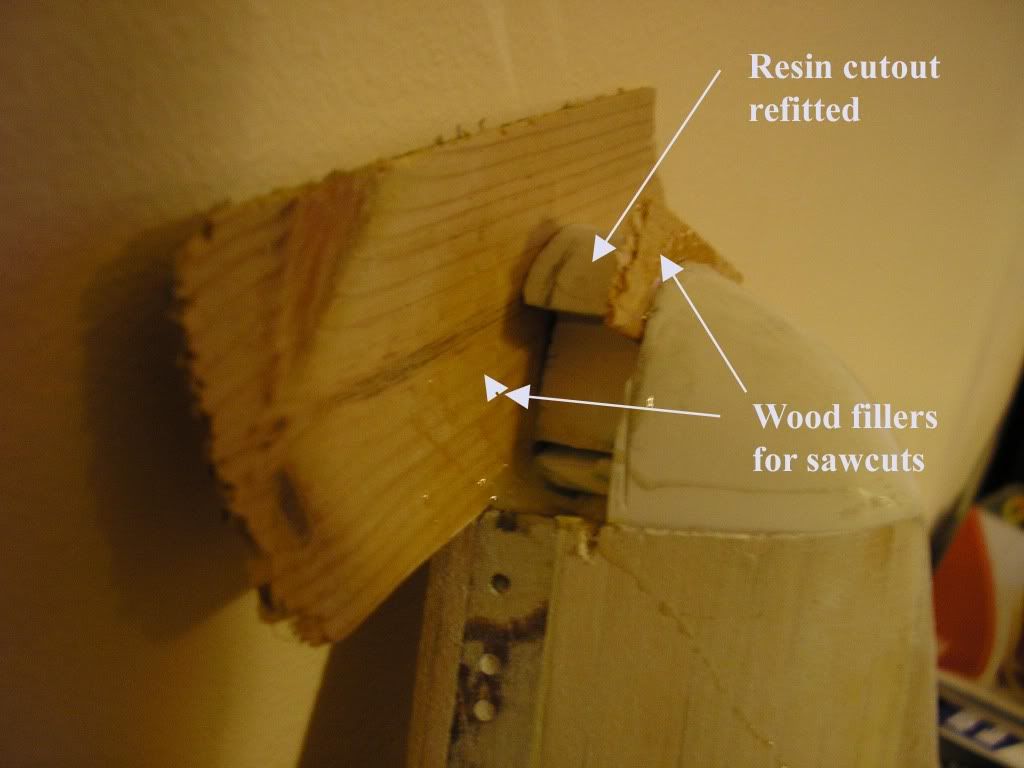 Next, I resited the anchor recess and filled in the suround with gash wood: 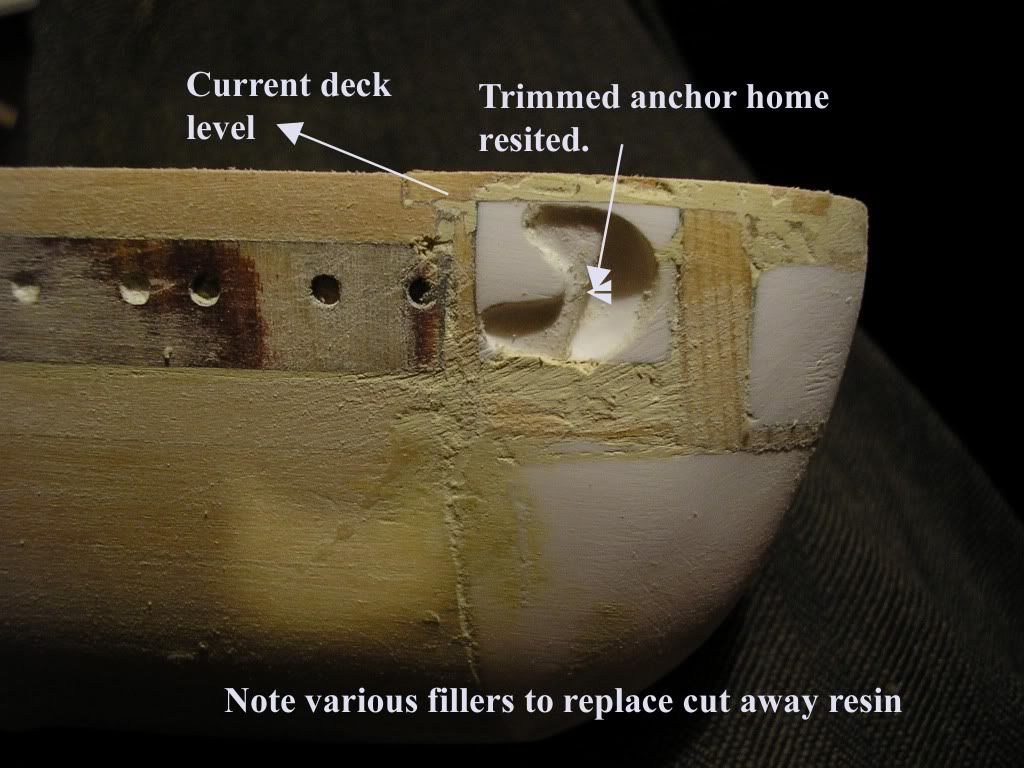 Finally, the section was snded down after making good. Note that the top of the anchor recess block has replaced part of the stern deck (part 63), this will later be covered over by the deck planking. 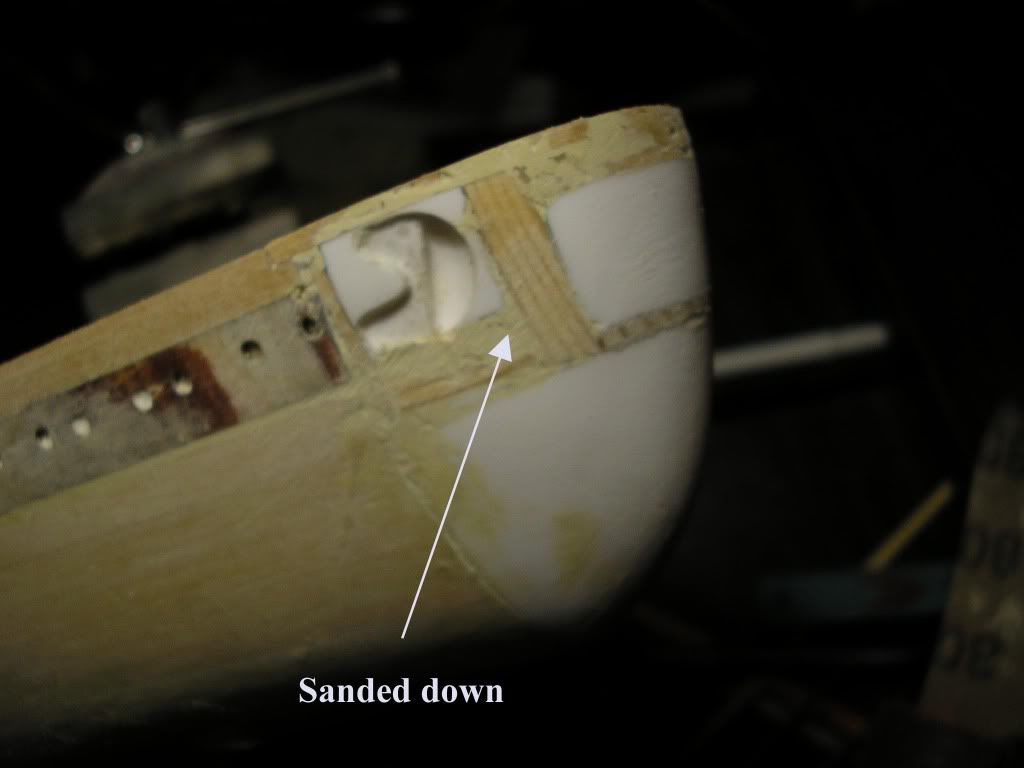 Note: there are still some small errors but hopefully not so noticeable, and hope to get away with it!!!! |
|
|
|
Post by swanrail on Feb 6, 2008 23:29:00 GMT 1
A further picture showing how the anchor recess resin part lies flush to the deck. This will later be decked over. 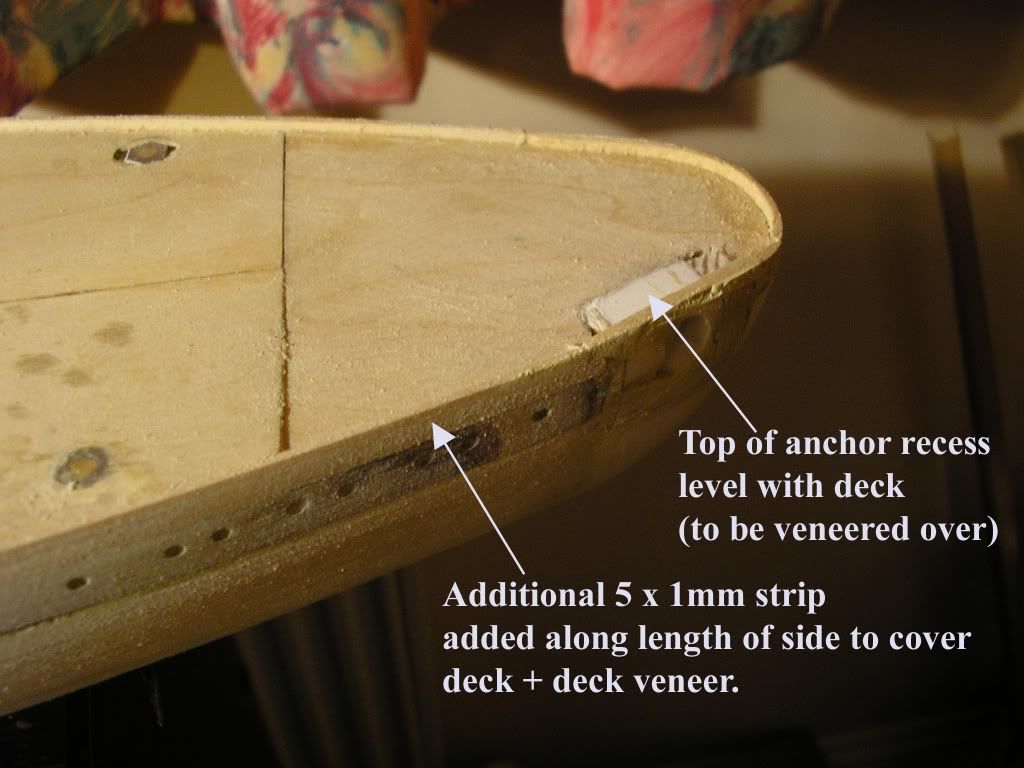 Also note that I have modified my side walls (as mentioned in another thread), such that the side walls now extend above the deck for its removalbe length. This has been done by gluing a 5 x 1mm strip on top of the original planking as per Hachette, and reducing the deck in width by a 1mm each side. When the deck has been properly planked, this 5mm strip will be reduced to be level to the veneered deck, and the angle adjusted such that the top of this plank slopes away, as per the drawings in the Anatomy of... plus , as can be clesrly seen, in the picture of the Bismarck on the front cover of each issue!! The ships side rails will be fitted onto the waterways of the removable deck (in the book, the rails are inside the outer skin as per the new modification), such that they can be removed from the hull when serving the motors with less chance of damage than if they were fitted to the fixed part of the hull. |
|
|
|
Post by swanrail on Feb 6, 2008 23:31:17 GMT 1
My moved anchor recess has now been blended in with primer. Compare to picture of Bismarck stern on page 132 of issue 44. 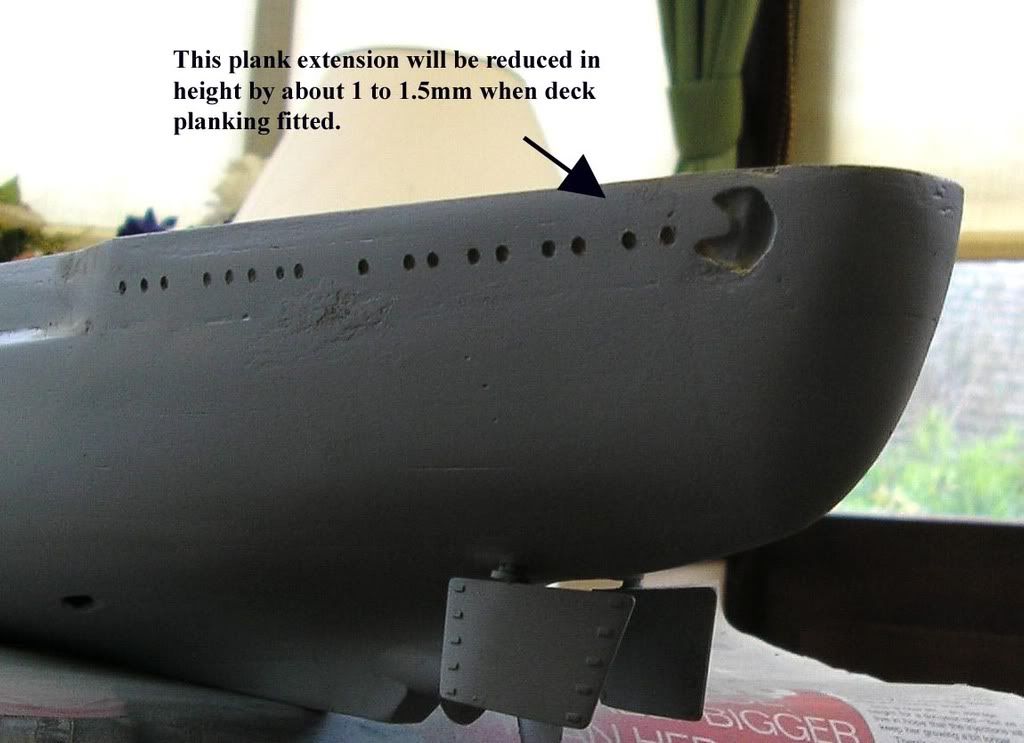 Please note that there is still some making good to be done. |
|
|
|
Post by swanrail on Feb 6, 2008 23:47:59 GMT 1
My stern as of today: 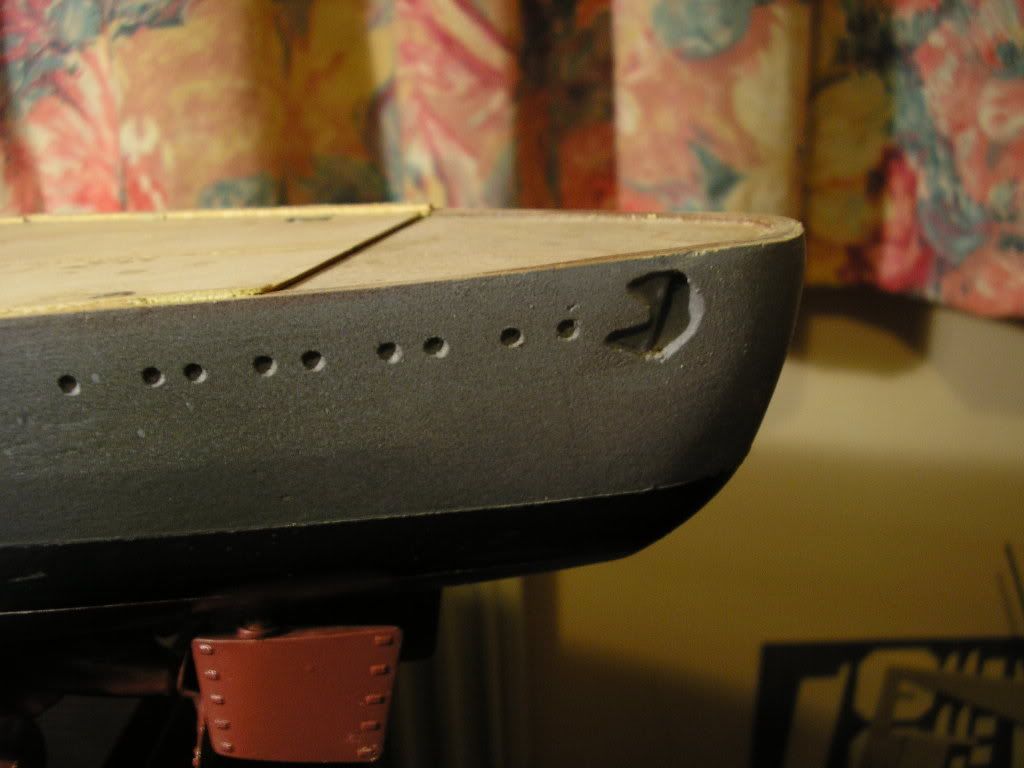 |
|

