Post by swanrail on Feb 20, 2008 18:30:06 GMT 1
Firstly, the preparation:
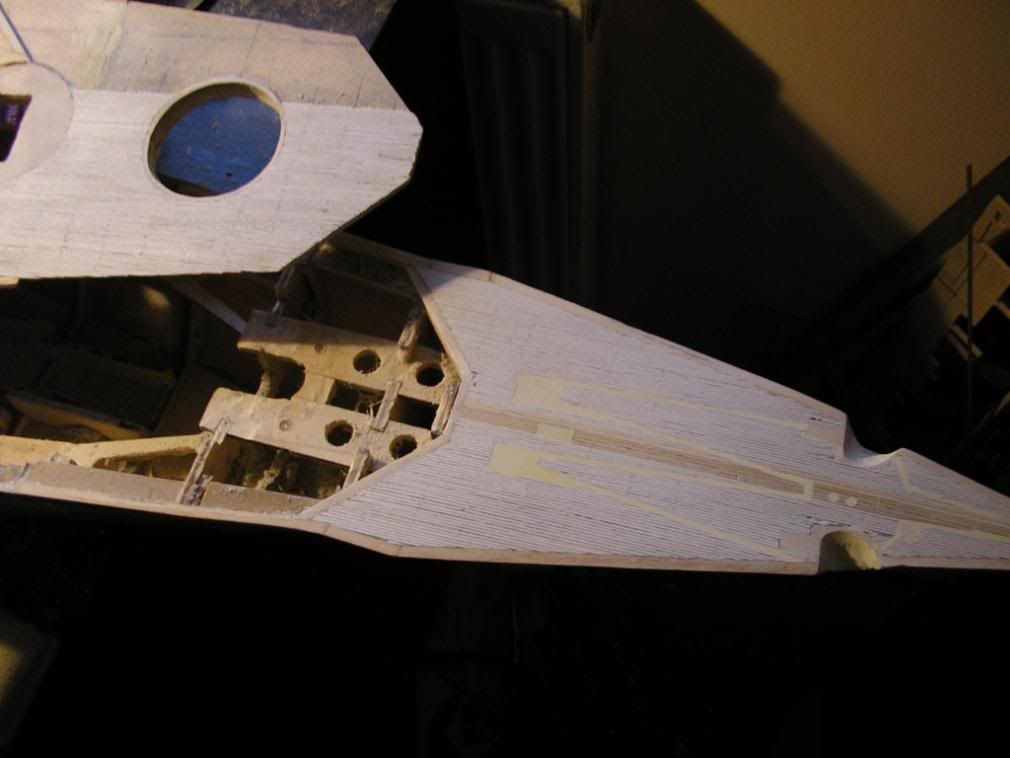
Make sure that the foredeck is perfectly flat and free of any lumps or bumps. The mark out on the deck firstly the centre line (this should always be maintained down the length of the hull in order to keep symmetry), then the outer waterways/margin planks. These latter run along the side of the foredeck, excepting the cutout for the anchors. Mine are 4mm wide, 2mm for the waterway, which later will be painted the same grey as the topside (actually metal on the real ship) and the other 2mm for the edging plank. On the real thing, this margin strip would be about 2 inches above the waterway, at 200 to 1 this is only 0.25 mm so not worth doing.
Around the cut out should be a 2mm wide margin plank only, mine was cut out of out of a 100mm x 1000mm x 1mm sheet bought fromthe Model Dockyard. I use the spare piece of wood used to get the correct angle on the bow wood section to mark out the inside shape and added 2mm to get the outside shape, then cut out using a craft knife.
At the stern of the foredeck, mark out the postion of the first breakwater. David has a diagram on my Queries and Comments section under post No. 48. In my case the width at the front is 247mm NOT 200mm, my figures directly from the "book".
Next, mark across the deck lines 15mm apart, starting at the front of the breakwater, this is where the deck planks will be cut into 30mm lengths.
When ready (measure twice, draw once!!), glue down the parts needed for the margin planks and breakwater. I use 4mm by 1mm planks.
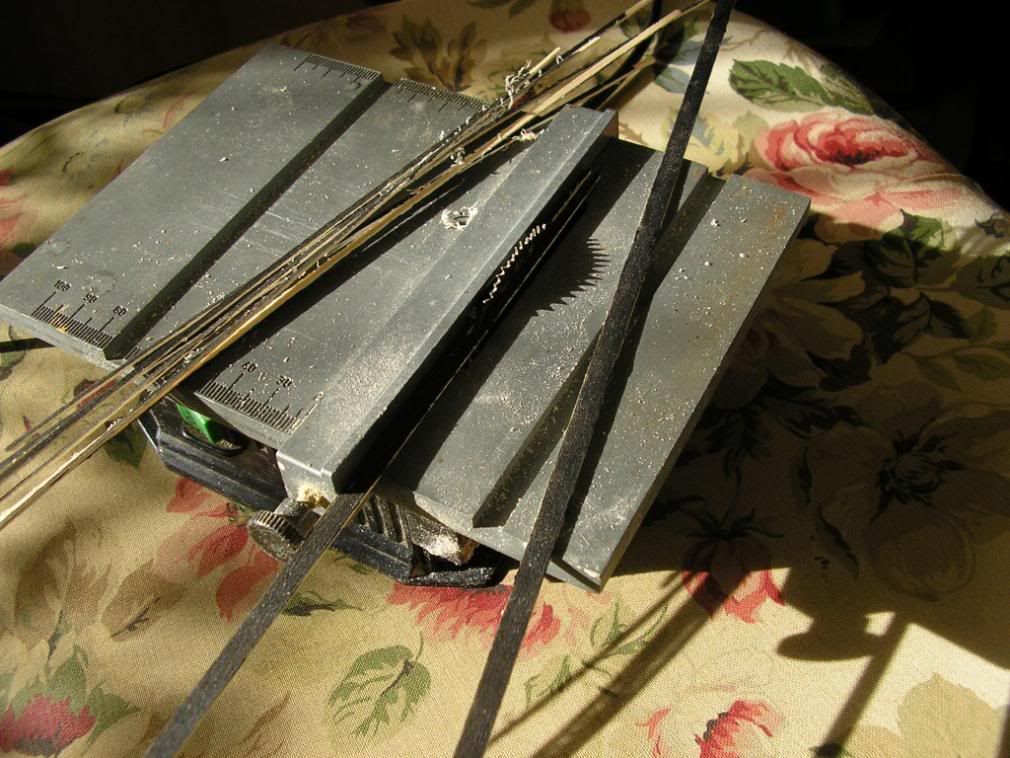
Next prepare the deck planks, they should be 0.75mm thick but as this is a non standard size, I have gone for 1mm, which looks if anything, better. You can get 1mm x 1mm planks, but I found these awkward to paint. for the same price, you can buy 5mm x 1mm planks, which I paint on one side with black acrylic artists paint (waterproof once dry), and then cut in half with my Minicraft sawbench, which gives me two planks 1.5mm x 1mm. (blade 2mm wide):
Take one plank, cut end square, and butt up against the breakwater one side of the centre line. Trim to overhang the foredeck (over the resin part) by about 2mm. This later will be trimmed back when the extra resin part is received from Hachette.
repeat this for another plank. Then glue the two together, using weatherproof wood glue, and immediately glue them, uncut side down either side of the centre line.(note it is important to keep the painted side always next to the unpainted side on the next plank).
When dry, taking one side, use a craft knife to cut through the plank at 30mm distances, do the same for the other plank, except this time the first cut should be 15mm from the end. This will give a brick effect as the planks are installed.
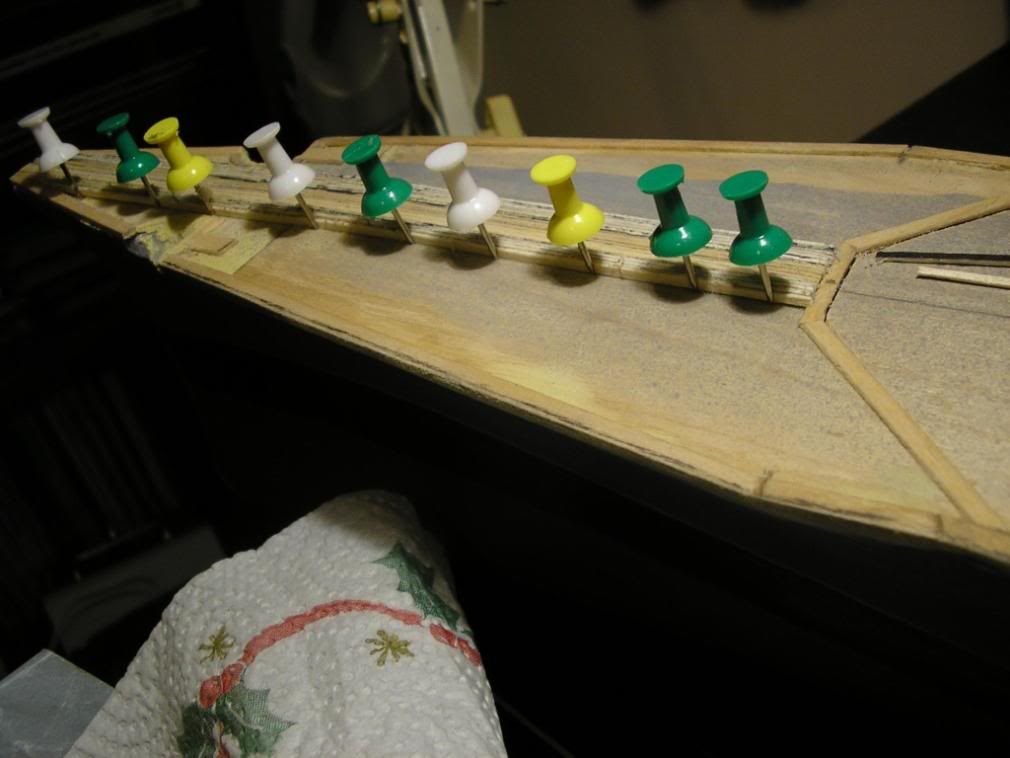
Carry on fixing and cutting planks making sure that the cuts form the brick effect and that then painted side is always in the correct place. I used map pins to make sure that each succesive plank butts tight against its predecessor. Do not attempt to cut until the plank is firmly glued down, at least a couple of hours, else you will end up with lots of loose 30mm planks!!!
Cutting the planks:
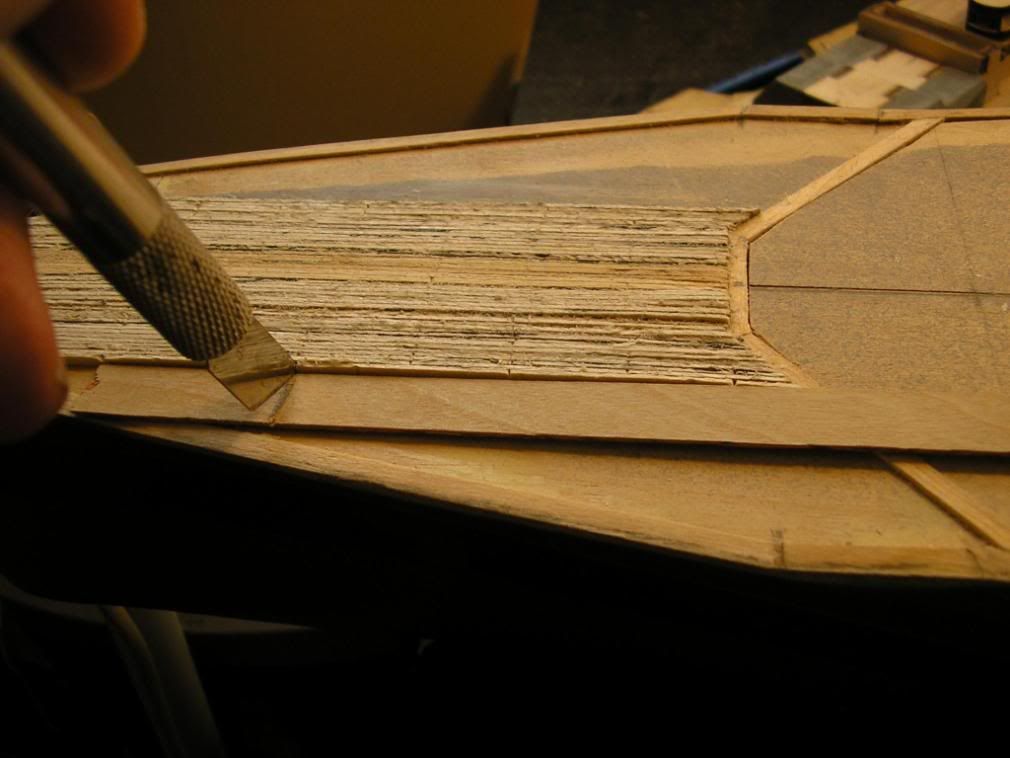
When you reach the sloping sides of the breakwater, make sure that the end of the plank is cut at the correct angle to fit snugly against the breakwater:
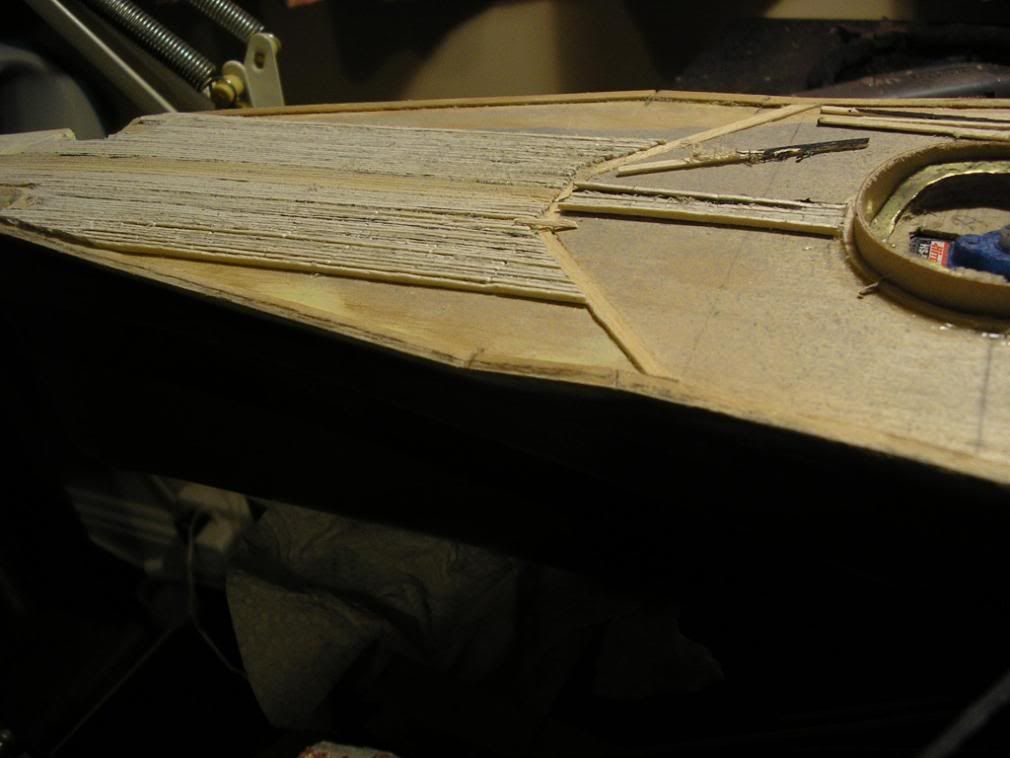
Carry on until the whole deck is complete:
Note in the picture above, special planks have been cut in.
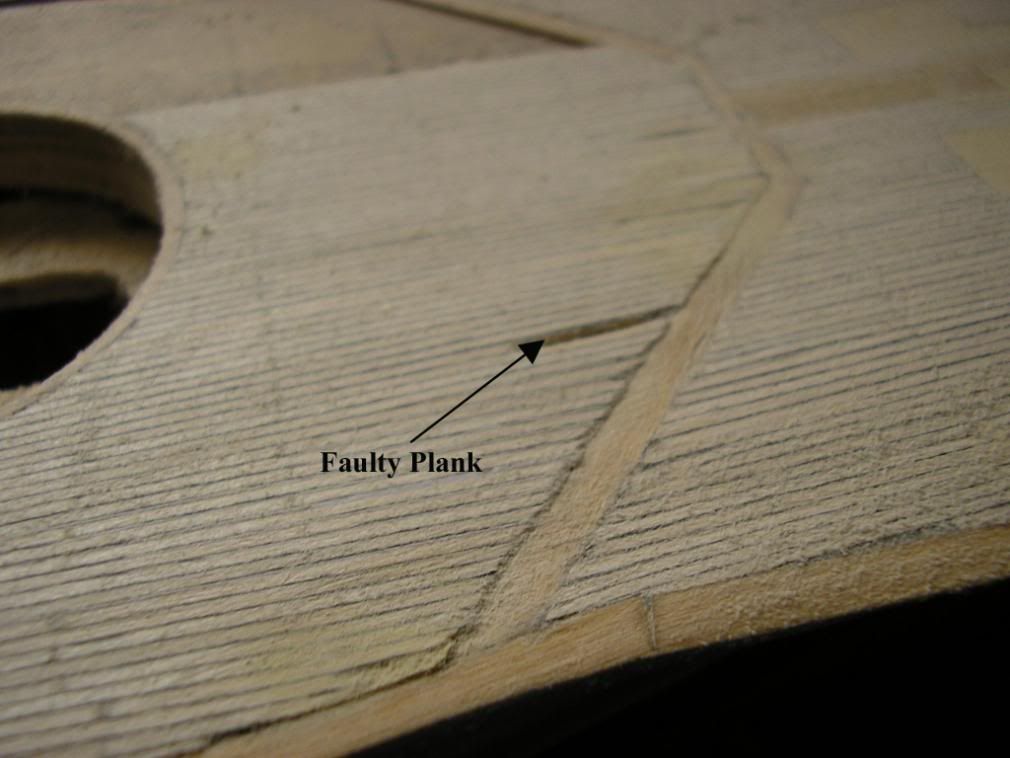
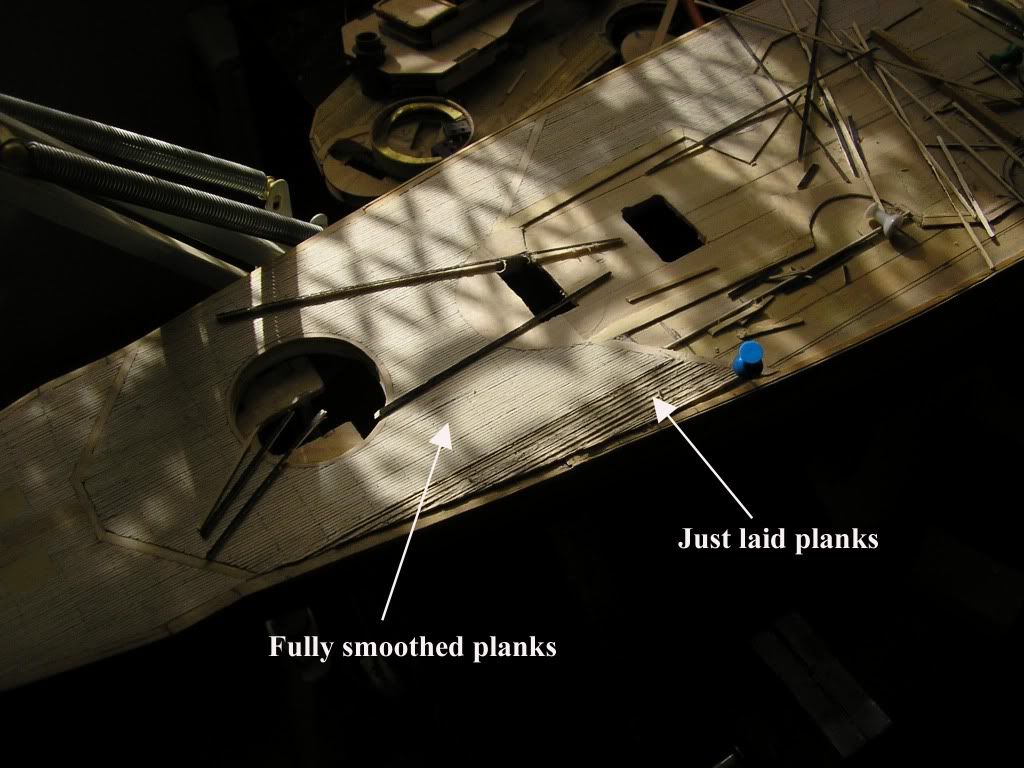
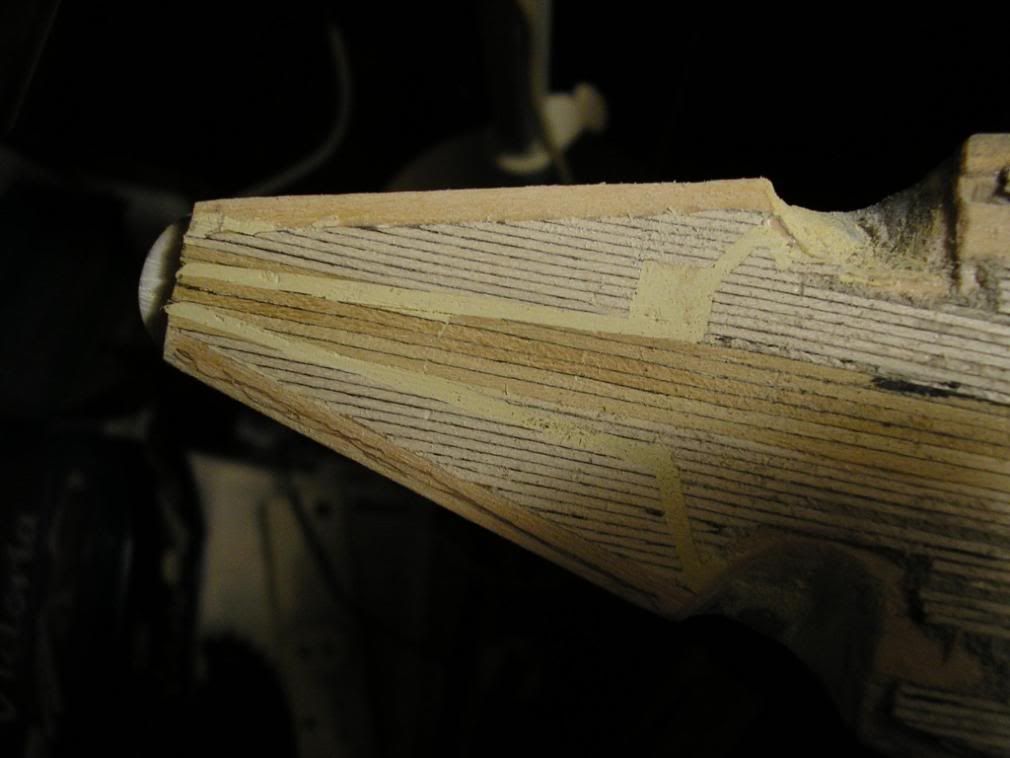
When the deck is complete, give it a good first sanding to level off the planks. I use a very rough sandpaper to do this. When reasonably smooth, I then drew in pencil lines where there is a need to insert the special planking. These positions were interpolated from drawings in the "book".
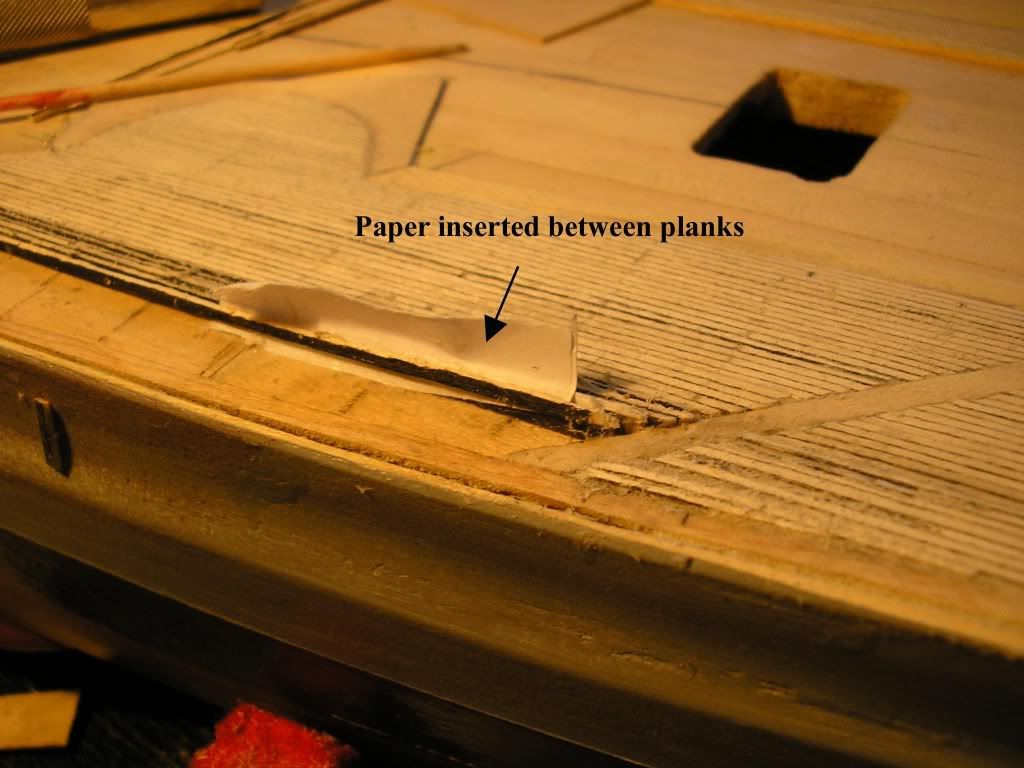
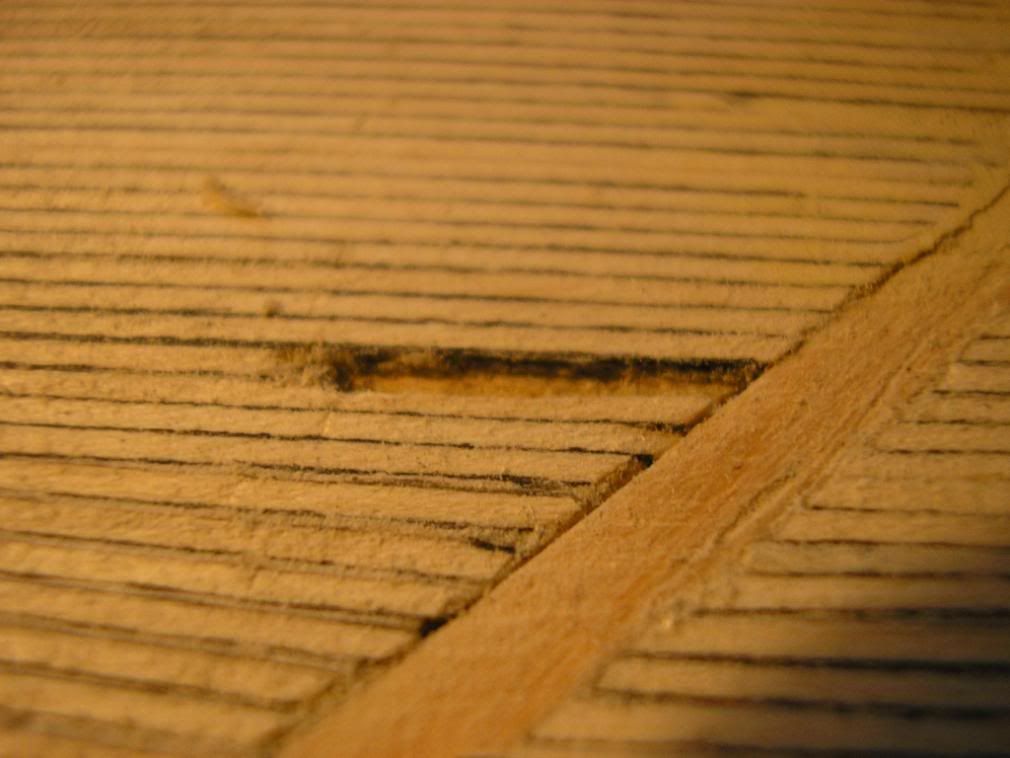
Using a large hacksaw and a very sharp craft knife, carefully cut along the lines using multi very light strokes (else the knife will wander). The straight new insert should be about 2mm wide when cuts are made, which must go right down to deck level. I then prised out the unwanted parts with a watchmakers flat screwdriver with a slightly less than 2mm blade, leaving a recess:
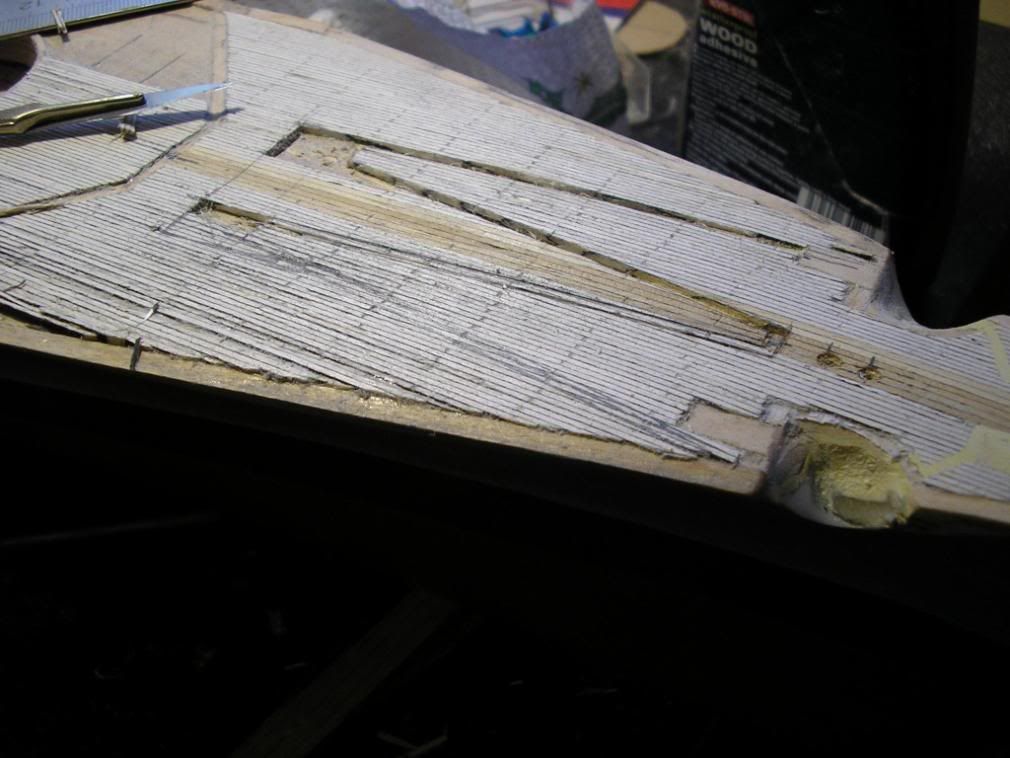
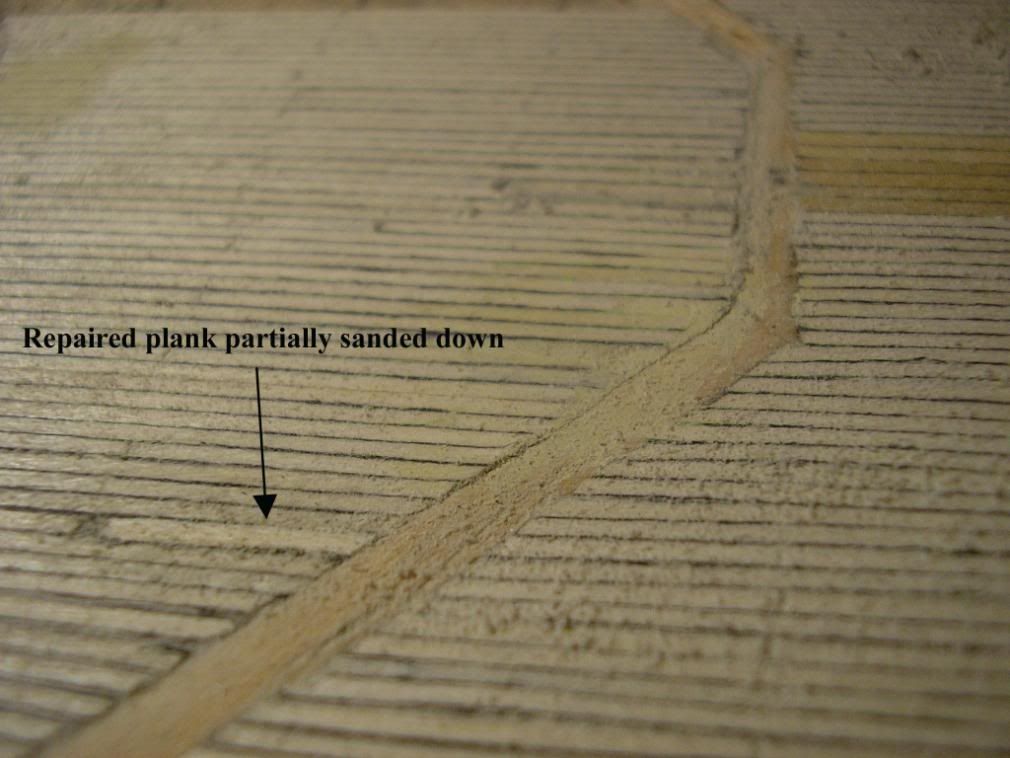
You can then either use two 1mm planks in the straight part of the cut out, but I chose to use wood filler:
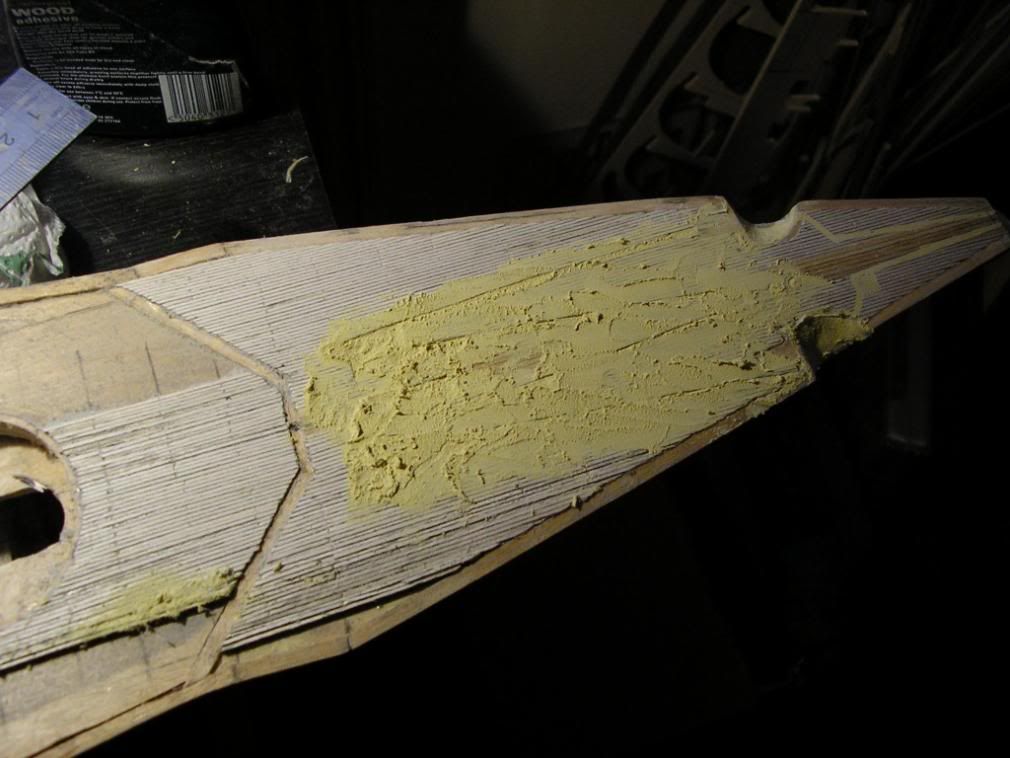
and when dry, sanded down, firstly coarsely, then finely:
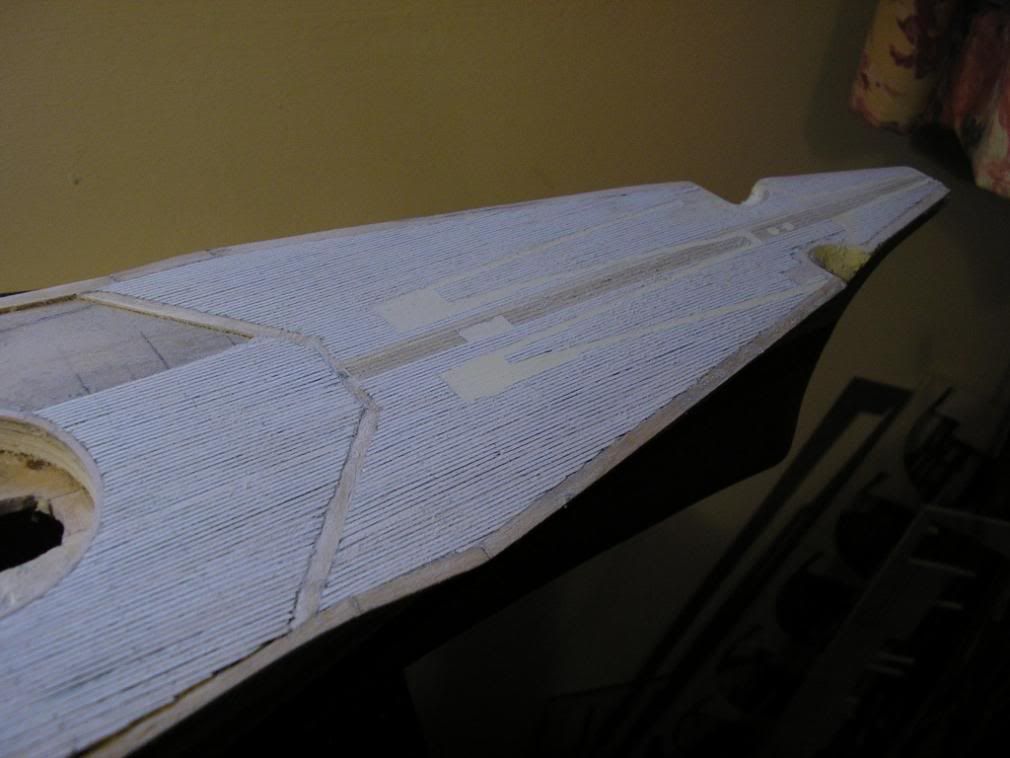
The deck will now be left until later, when it will be given a very fine sanding to get a good finish, the deck attachments fitted (probably about issue 120!!!), and then matt finish clear varnished to seal.
Make sure that the foredeck is perfectly flat and free of any lumps or bumps. The mark out on the deck firstly the centre line (this should always be maintained down the length of the hull in order to keep symmetry), then the outer waterways/margin planks. These latter run along the side of the foredeck, excepting the cutout for the anchors. Mine are 4mm wide, 2mm for the waterway, which later will be painted the same grey as the topside (actually metal on the real ship) and the other 2mm for the edging plank. On the real thing, this margin strip would be about 2 inches above the waterway, at 200 to 1 this is only 0.25 mm so not worth doing.
Around the cut out should be a 2mm wide margin plank only, mine was cut out of out of a 100mm x 1000mm x 1mm sheet bought fromthe Model Dockyard. I use the spare piece of wood used to get the correct angle on the bow wood section to mark out the inside shape and added 2mm to get the outside shape, then cut out using a craft knife.
At the stern of the foredeck, mark out the postion of the first breakwater. David has a diagram on my Queries and Comments section under post No. 48. In my case the width at the front is 247mm NOT 200mm, my figures directly from the "book".
Next, mark across the deck lines 15mm apart, starting at the front of the breakwater, this is where the deck planks will be cut into 30mm lengths.
When ready (measure twice, draw once!!), glue down the parts needed for the margin planks and breakwater. I use 4mm by 1mm planks.
Next prepare the deck planks, they should be 0.75mm thick but as this is a non standard size, I have gone for 1mm, which looks if anything, better. You can get 1mm x 1mm planks, but I found these awkward to paint. for the same price, you can buy 5mm x 1mm planks, which I paint on one side with black acrylic artists paint (waterproof once dry), and then cut in half with my Minicraft sawbench, which gives me two planks 1.5mm x 1mm. (blade 2mm wide):
Take one plank, cut end square, and butt up against the breakwater one side of the centre line. Trim to overhang the foredeck (over the resin part) by about 2mm. This later will be trimmed back when the extra resin part is received from Hachette.
repeat this for another plank. Then glue the two together, using weatherproof wood glue, and immediately glue them, uncut side down either side of the centre line.(note it is important to keep the painted side always next to the unpainted side on the next plank).
When dry, taking one side, use a craft knife to cut through the plank at 30mm distances, do the same for the other plank, except this time the first cut should be 15mm from the end. This will give a brick effect as the planks are installed.
Carry on fixing and cutting planks making sure that the cuts form the brick effect and that then painted side is always in the correct place. I used map pins to make sure that each succesive plank butts tight against its predecessor. Do not attempt to cut until the plank is firmly glued down, at least a couple of hours, else you will end up with lots of loose 30mm planks!!!
Cutting the planks:
When you reach the sloping sides of the breakwater, make sure that the end of the plank is cut at the correct angle to fit snugly against the breakwater:
Carry on until the whole deck is complete:
Note in the picture above, special planks have been cut in.
When the deck is complete, give it a good first sanding to level off the planks. I use a very rough sandpaper to do this. When reasonably smooth, I then drew in pencil lines where there is a need to insert the special planking. These positions were interpolated from drawings in the "book".
Using a large hacksaw and a very sharp craft knife, carefully cut along the lines using multi very light strokes (else the knife will wander). The straight new insert should be about 2mm wide when cuts are made, which must go right down to deck level. I then prised out the unwanted parts with a watchmakers flat screwdriver with a slightly less than 2mm blade, leaving a recess:
You can then either use two 1mm planks in the straight part of the cut out, but I chose to use wood filler:
and when dry, sanded down, firstly coarsely, then finely:
The deck will now be left until later, when it will be given a very fine sanding to get a good finish, the deck attachments fitted (probably about issue 120!!!), and then matt finish clear varnished to seal.