Post by swanrail on Feb 23, 2008 13:27:17 GMT 1
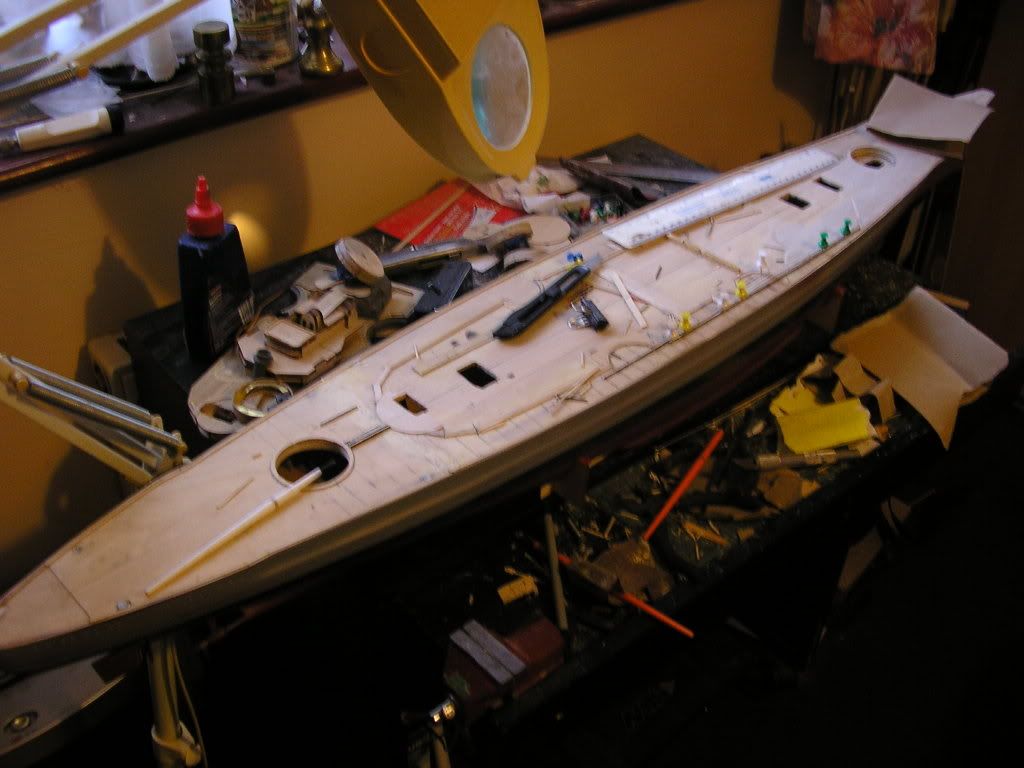
The model is now in the fitting out stage for its decks:
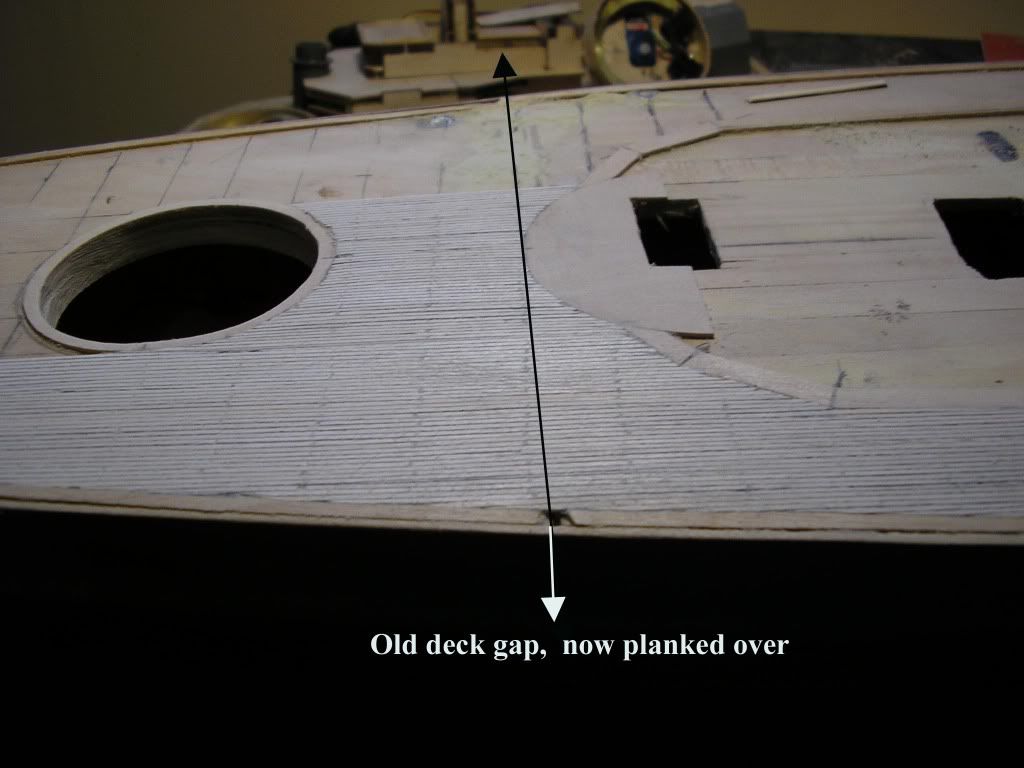
Planking the main deck follows the same principles as for the foredeck.
Firstly, make sure that the deck is level and smooth, as any bumps will offset the planking. Then fit margin planks along both sides to line up with the edge of the removable deck, make sure no glue can seep through to fasten the removable bit permanently!!!
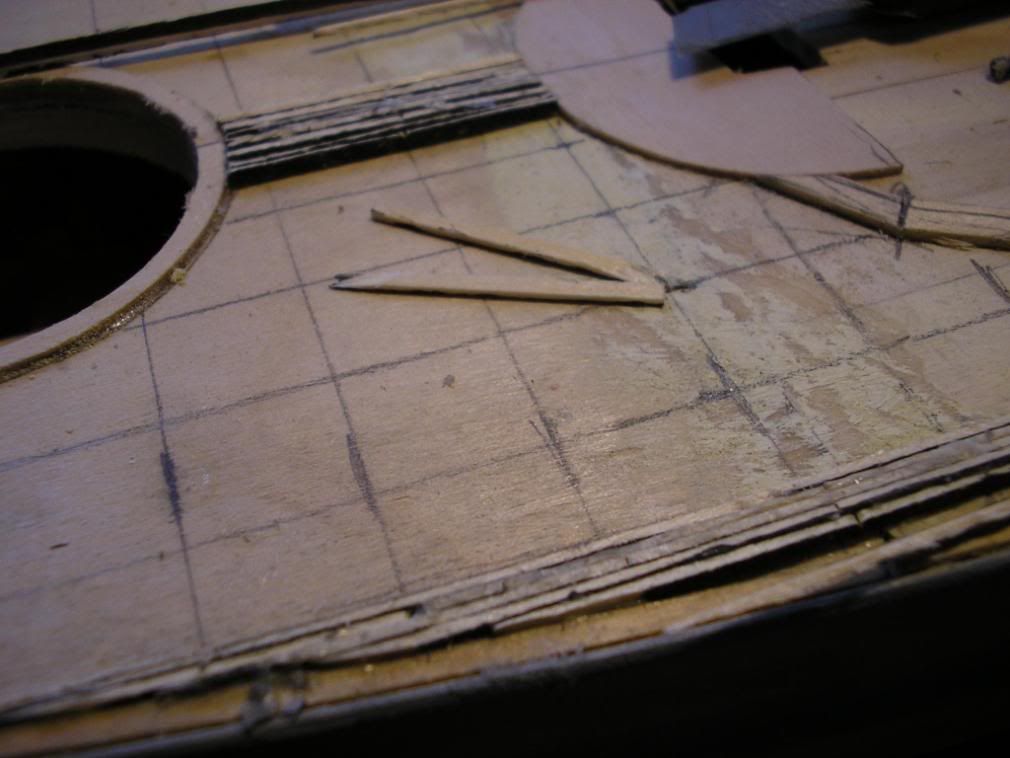
Next place the deck housings ACCURATELY in their final positions (I used measurements from the "book" to achieve this) and then draw around them tightly with a soft pencil. Remove the deck housings, and now scribe another pencil line 3mm on the outer side of the housings, this marks the outside edge of the margin planks.
The picture below shows the margin planks in place for the deck housings:
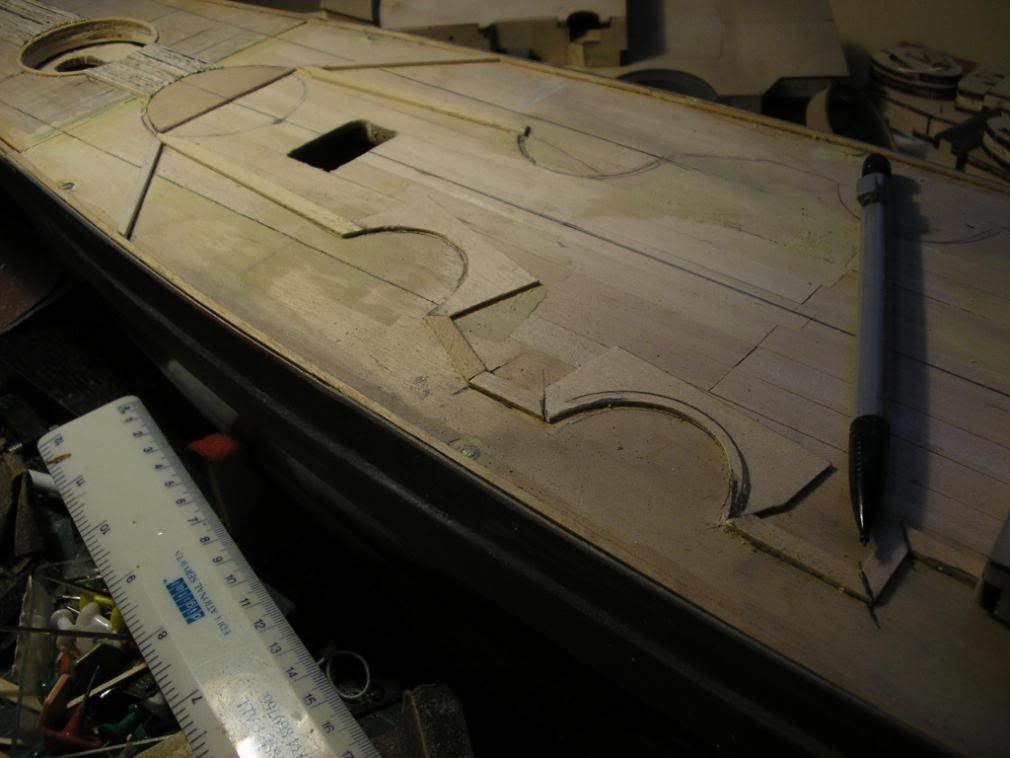
you can see on the right hand circular cutout the pencil mark on it where the outside edge of the deck housing will sit. Allowing 1mm for the brass veneer, leaves a 2mm wide margin plank.
I made the circular cutouts using a circular cutter (readily available from stationers at about £3.50), really meant for paper but can handle thin (1mm) wood as well.

using a 1mm by 100mm by 1000mm sheet, I cut out the circle as shown and left a backing square section.
For the gun tuirrets, mine will sink into the deck to allow me to fit my turning gear, so i marked out the circle needed on the main deck, and cut this out with a coping saw (too thick for the hole cutter). I then cut out a disk of a diameter 6mm bigger than the turret hole (again to allow for the brass work and a 2mm margin plank) and accurately glued this over the hole. When dry, I cut out the centre again using the circular cutter.(as shown in the picture of the cutter above)
This can partially be seen in the next picture, for the gun turret Caesar:
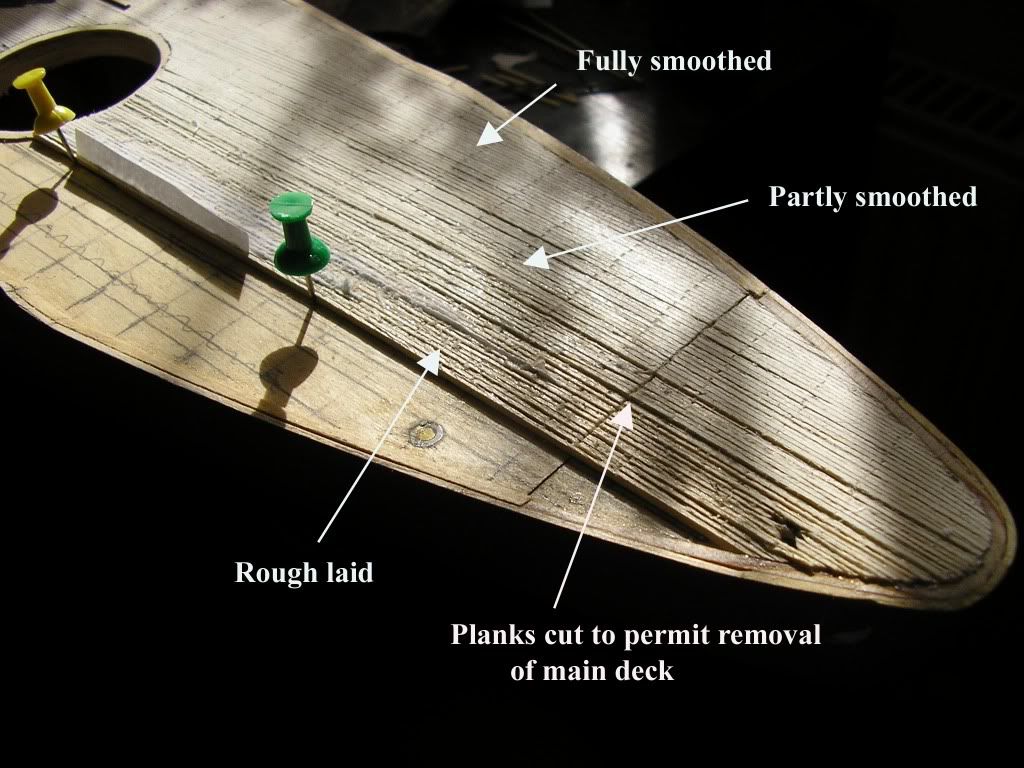
Also seen in this picture is a pencil grid, those across the ship mark the plank cutting lengths (each plank is 30mm long and interlaced with the adjacent plank), whereas the longitudinal lines are markers to help keep the planks in line and not to wander off as work progesses down the hull.
As I am using 300mm planks, I am making a seamless joint to get the length I need by making the joins on a position where the plank would naturally be cut for its 30mm length, and again staggering them to stop the joints being obvious.
Otherwise, planking carried out as per the foredeck!!!
Planking the main deck follows the same principles as for the foredeck.
Firstly, make sure that the deck is level and smooth, as any bumps will offset the planking. Then fit margin planks along both sides to line up with the edge of the removable deck, make sure no glue can seep through to fasten the removable bit permanently!!!
Next place the deck housings ACCURATELY in their final positions (I used measurements from the "book" to achieve this) and then draw around them tightly with a soft pencil. Remove the deck housings, and now scribe another pencil line 3mm on the outer side of the housings, this marks the outside edge of the margin planks.
The picture below shows the margin planks in place for the deck housings:
you can see on the right hand circular cutout the pencil mark on it where the outside edge of the deck housing will sit. Allowing 1mm for the brass veneer, leaves a 2mm wide margin plank.
I made the circular cutouts using a circular cutter (readily available from stationers at about £3.50), really meant for paper but can handle thin (1mm) wood as well.
using a 1mm by 100mm by 1000mm sheet, I cut out the circle as shown and left a backing square section.
For the gun tuirrets, mine will sink into the deck to allow me to fit my turning gear, so i marked out the circle needed on the main deck, and cut this out with a coping saw (too thick for the hole cutter). I then cut out a disk of a diameter 6mm bigger than the turret hole (again to allow for the brass work and a 2mm margin plank) and accurately glued this over the hole. When dry, I cut out the centre again using the circular cutter.(as shown in the picture of the cutter above)
This can partially be seen in the next picture, for the gun turret Caesar:
Also seen in this picture is a pencil grid, those across the ship mark the plank cutting lengths (each plank is 30mm long and interlaced with the adjacent plank), whereas the longitudinal lines are markers to help keep the planks in line and not to wander off as work progesses down the hull.
As I am using 300mm planks, I am making a seamless joint to get the length I need by making the joins on a position where the plank would naturally be cut for its 30mm length, and again staggering them to stop the joints being obvious.
Otherwise, planking carried out as per the foredeck!!!