Post by Mike B on Jan 22, 2010 13:46:53 GMT 1
For anyone building "Tall ships", here is a method I came up with to easily make an "Engraved" nameplate.
Take a length of light coloured wood,

and glue 3 layers of veneer edging (not the pre-glued type) to it's surface with PVA.
I used Imbuia edging but you can use Walnut or any close grained dark wood edging.

Create your "Logo" with a program such as MSPaint and print it out. Coat the veneer with PVA by brushing the glue on thinly and evenly and then place the paper template on top and smooth it out.

Now, you carefully cut away the veneer bit by bit around the letters, cutting down to the backing strip of light coloured wood. Make sure you don’t get any blood on the veneer!
When all the letters are done, use thin CA straight from the bottle to coat the bases, sides and tops of the letters. This ensures that the layers of veneer are solidly glued together and will not delaminate.
Now lightly sand off the paper on top of the letters using a sanding stick.

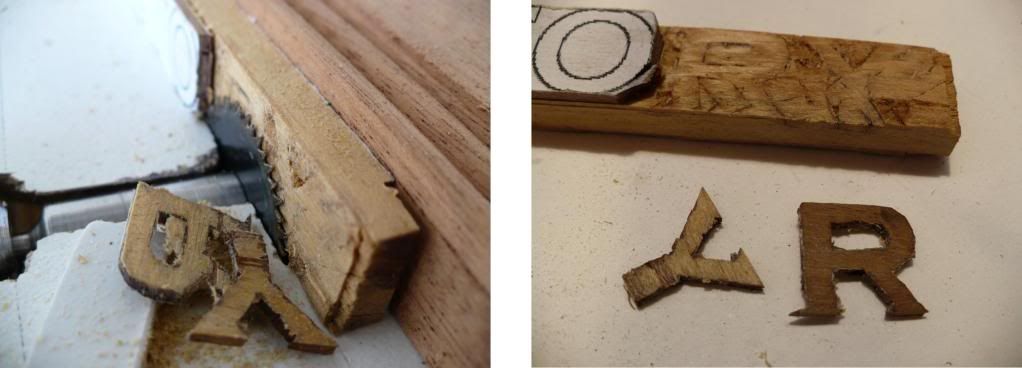
Now using a table saw, slice off the letters.


The beauty of this method is that if you make a "faut pas" of one of the letters, you only need to make a new letter and not a new nameplate.
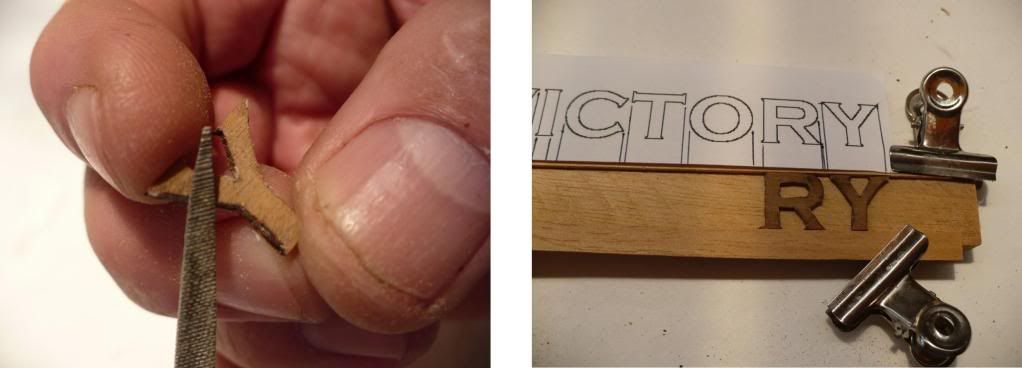
Clean up the edges of the letters with a file or sanding stick.
Cut a new backing strip of wood and clamp two pieces of planking top and bottom as guides for the lettering.
Using a spare paper template with vertical markings drawn on it, line up the lettering between the guide strips.
Glue the letters to the backing strip one at a time using thick CA on the back of the letter and placing it with tweezers on the backing strip.

When all the letters are in place, glue a 1mm² strip of walnut along the edge of the wood to frame it nicely.
2 coats of sanding sealer and 2 brass tubes or rods fitted underneath and you have a lovely nameplate for the baseplate of your model.

Take a length of light coloured wood,

and glue 3 layers of veneer edging (not the pre-glued type) to it's surface with PVA.
I used Imbuia edging but you can use Walnut or any close grained dark wood edging.

Create your "Logo" with a program such as MSPaint and print it out. Coat the veneer with PVA by brushing the glue on thinly and evenly and then place the paper template on top and smooth it out.

Now, you carefully cut away the veneer bit by bit around the letters, cutting down to the backing strip of light coloured wood. Make sure you don’t get any blood on the veneer!
When all the letters are done, use thin CA straight from the bottle to coat the bases, sides and tops of the letters. This ensures that the layers of veneer are solidly glued together and will not delaminate.
Now lightly sand off the paper on top of the letters using a sanding stick.

Now using a table saw, slice off the letters.


The beauty of this method is that if you make a "faut pas" of one of the letters, you only need to make a new letter and not a new nameplate.
Clean up the edges of the letters with a file or sanding stick.
Cut a new backing strip of wood and clamp two pieces of planking top and bottom as guides for the lettering.
Using a spare paper template with vertical markings drawn on it, line up the lettering between the guide strips.
Glue the letters to the backing strip one at a time using thick CA on the back of the letter and placing it with tweezers on the backing strip.

When all the letters are in place, glue a 1mm² strip of walnut along the edge of the wood to frame it nicely.
2 coats of sanding sealer and 2 brass tubes or rods fitted underneath and you have a lovely nameplate for the baseplate of your model.


