|
|
Post by grantj on Jan 24, 2010 8:24:49 GMT 1
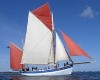
After painting the superstructure I was quite depressed to see that all that lovely detail and all those hundreds of fiddly little bits so painstakingly put on just seemed to blend in and be unseen so i decided to play around with washes. This is the left side before giving it any washes  Now for the opposite side after giving it the tratment of washes and drybrushing. Suddenly all of the finer detail is now visible.  Another shot of it placed on the hull  |
|
|
|
Post by bruno on Jan 24, 2010 11:48:16 GMT 1
This seems a good trick.
Please grandtj how do yo do it exactly?
|
|
|
|
Post by rem2007 on Jan 24, 2010 21:21:24 GMT 1
...nice effect for washes and drybrushing, just a quicj question in your before 1st picture, the door with the prothole, is it upside down?
It looks like the porthole is at the bottom, or are my eyes playing tricks on me.
Robert
|
|
|
|
Post by nm on Jan 24, 2010 23:43:58 GMT 1
...nice effect for washes and drybrushing, just a quicj question in your before 1st picture, the door with the prothole, is it upside down? It looks like the porthole is at the bottom, or are my eyes playing tricks on me. Robert It's a flap for the ship's cat (that later became a RN cat)! nm |
|
|
|
Post by grantj on Jan 25, 2010 6:58:29 GMT 1
Big Ooooops! Thanks Robert did not even notice it! I will post a detailed explanation later this eve when I get home from work but in the interim here are further pics of the structure(and yes the porthole is still there for the cat!)   |
|
|
|
Post by grantj on Jan 25, 2010 20:25:19 GMT 1
Here is the method I used in washing and drybrushing my model:
1. The structure was painted overall RAL7001 usng xtracolor enamel paint and allowed to dry for a few days.
2. I then mixed up the wash mixture using some Tamiya Dark Grey Acrylic paint with some Tamiya Acrylic Thinners in a ratio of about 20%paint to 80%thinners. The reason for now using acrylic paint is that it will not react with the first enamel layer.
3. Using a fine brush I then let the paint/thinner mixture flow around the edges of all the raised pieces on the model such as doors,shutters etc. There is no need to worry about getting the odd drop of paint in the wrong place as you can touch it up in the next few steps.
4. Once the wash coat hasdried overnight I start with the drybrushing. As the name suggests drybrushing is done by dipping a soft (preferably flat not round)brush in the paint and then wiping the brush of on a cloth until almost no paint is left on the brush. Run the brush gently over the model and the paint will stick to all the highest spots of the model. Play around using different pressures on the brush to get different effects .
5. The first drybrush coat I gace was using my original RAL7001 base colour. Once dried I then gave it a second drybrushing using a very very light gray to pick out the detail on finer areas that needed highlighting for instance the very fine eleectrical cabling runnuing along the sides.
6. If I find the finished result too stark in contrast then I gently airbrush a very heavily thinned (same ratio as the wash) layer over the whole thing and it tones it down slightly.
I hope this helps and suggest you try it out on an area that is not so noticeable and remember if worst comes to worst just respray and start again. This is a very simple but effective technique.
Good Luck
|
|
|
|
Post by rem2007 on Jan 25, 2010 20:31:45 GMT 1
Did you see the article a few months ago in Model Boats mag on weathering, 2 parts and very informative?
|
|
|
|
Post by rem2007 on Jan 25, 2010 20:34:43 GMT 1
...must have been a good swimmer.
|
|
|
|
Post by grantj on Jan 26, 2010 7:43:28 GMT 1
|
|
|
|
Post by coenie on Jan 26, 2010 19:16:55 GMT 1
Beautiful.... and there I thought it couldn't get more detailed.
Have a K for sharing this important part of model building.
|
|
|
|
Post by grantj on Jan 26, 2010 19:39:14 GMT 1
Thanks Coenie,
It is always a pleasure sharing ideas and knowledge especially when it gets appreciated!
Hope it helps you on your model
|
|