|
|
Post by swanrail on Jan 27, 2008 0:42:04 GMT 1
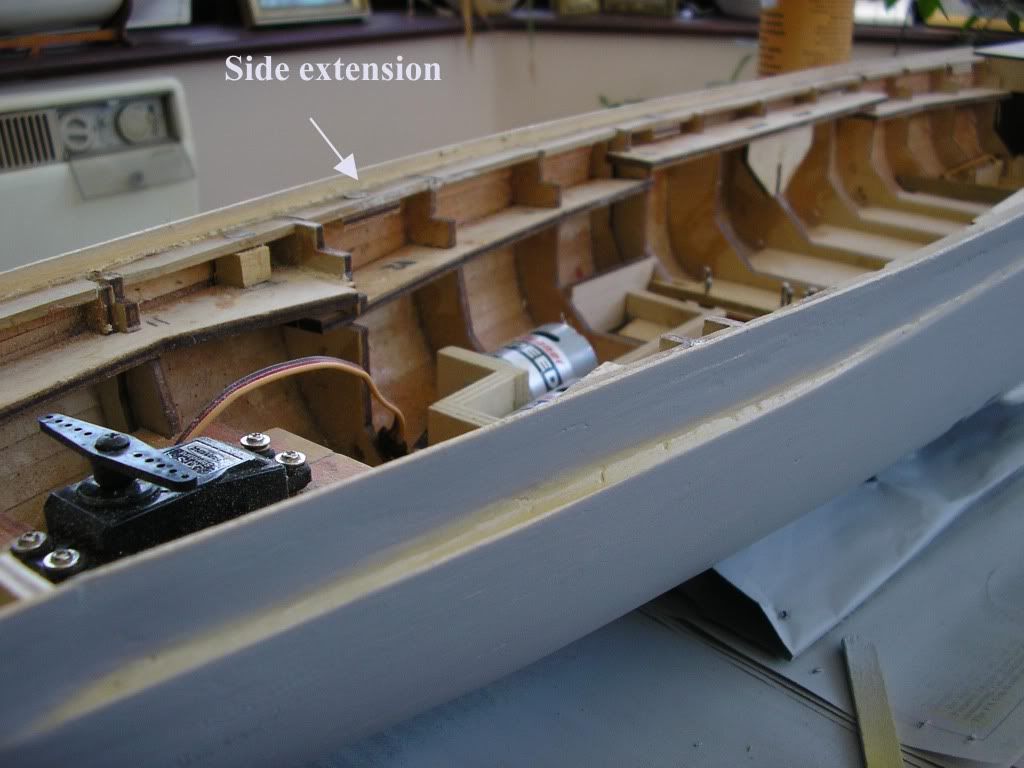
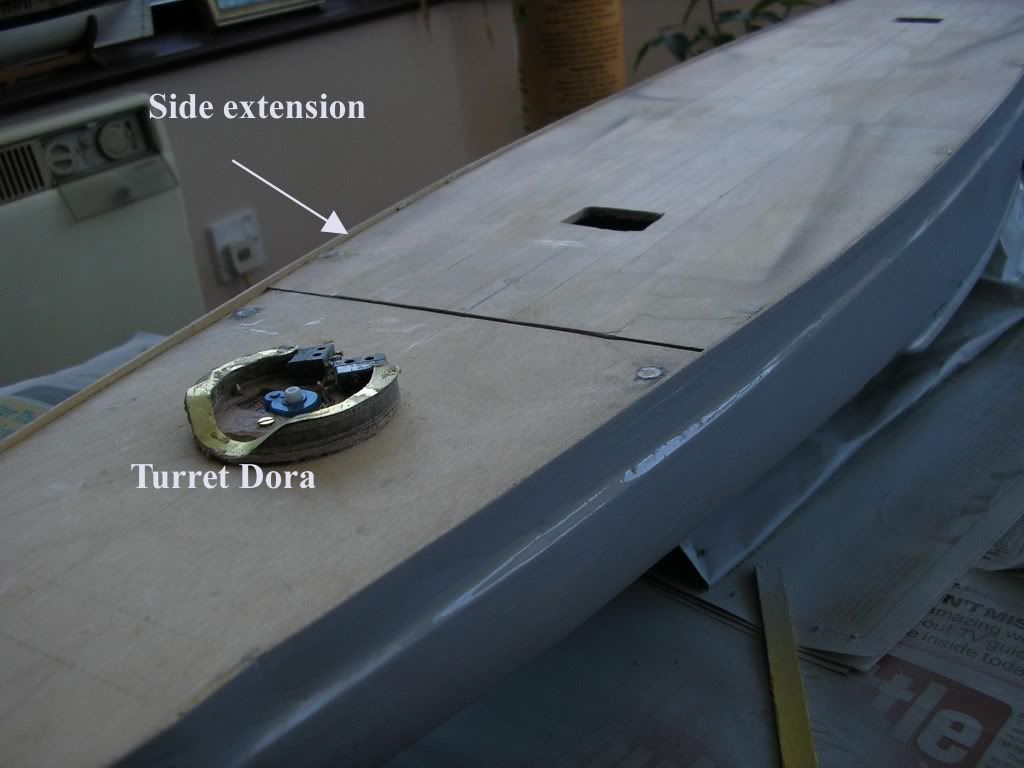
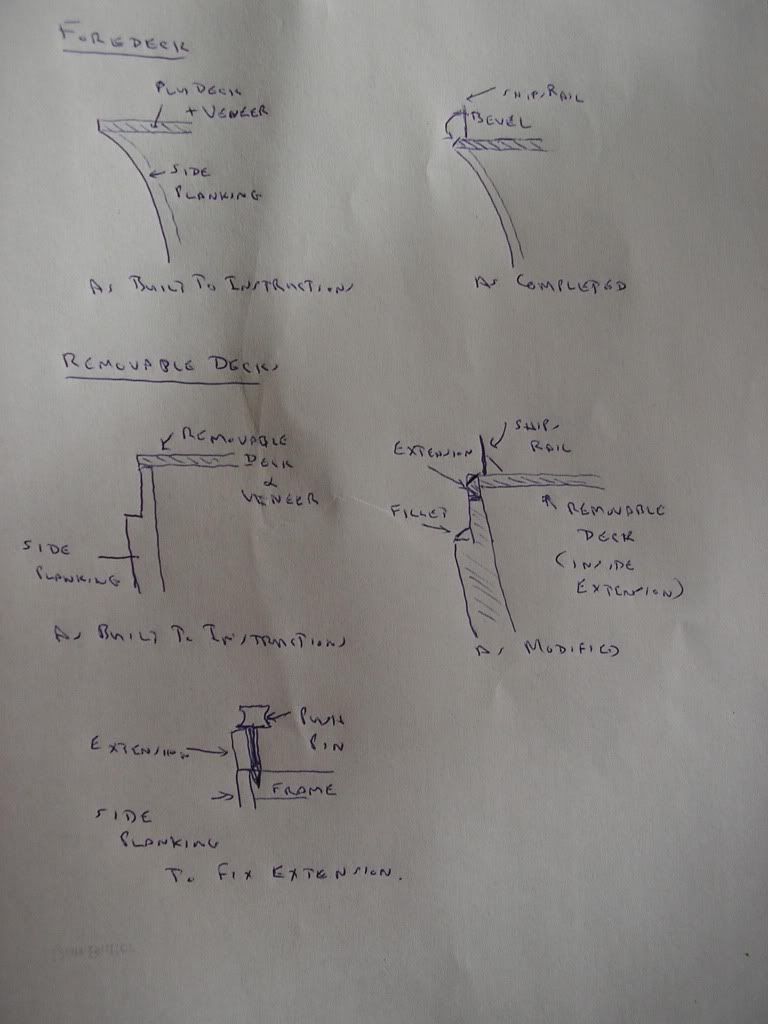
Shows side walls with decks removed:  and with decks fitted:  note that these extension pieces will be sanded down to be level with the deck when fully planked, and the outside edge bevelled as per my diagram below:  the bottom drawing shows how I fixed the extension plank in place. I used push pins (large map pins) on each frame, fitting the pin as close to the original planking as possible. The new plank was then coated with Evostik waterproof glue on its bottom edge and put into place. It was then clamped firmly by pushing down hard on the push pins and left for 24 hours. This technique ensures the new plank was in alignment with the plank below and held tightly in place to make a strong joint. |
|
|
|
Post by swanrail on Jan 27, 2008 1:03:47 GMT 1
afkmatrix has just reminded me, that I did not mention the use of sellotape!! (thanks for that!).
I used sellotape to hold the intermediate points along the plank firmly down while the glue set, and also to ensure that the new plank was perfectly aligned to the plank below.
|
|
|
|
Post by swanrail on Feb 8, 2008 17:28:53 GMT 1
When first completed, the side extensions were very weak, and subject to damage.
To overcome this, a solution could be to glass mat and resin the sides, but this is very messy and hard to do, also raises problems with fitting the decks.
I then remembered a tin of Ronseal wood hardener in my garage. This I have used in the past to stiffen up decayed wood prior to applying wood filler.
I then applied two coats to the side extensions, which are now very rigid, and able to take a lot of punsishment (I tried it!!!).
The hardener is a clear liquid and dries like Glattfix, in fact, I reckon that I should have used it on the hull, as it would have made a better job.
Also being a waterproofer, it seals the hull as well, so that my use of resin inside would become redundant - too late now!!!
|
|