|
|
Post by nemesis on Apr 22, 2008 18:39:13 GMT 1
It looks like you've been building card models for years, Mike. Not your first one.
|
|
|
|
Post by Mike B on Apr 22, 2008 21:47:45 GMT 1
It looks like you've been building card models for years, Mike. Not your first one. If it can be cocked up, I am at the head of the queue! That's why I am being so careful! You'll only see the pictures of the successful stages! ;D |
|
|
|
Post by Mike B on Apr 28, 2008 12:29:03 GMT 1
Cladding the bottom of the hull. Now comes the exciting part! To start with, never having done a card model before, I am going to scan each part that I am not sure of and print out a draft copy. I am going to practice the assembly with these copies to get the hang of it and when I am familiar with the construction methods, I will assemble the real parts. TIP:- A piece of upholstery foam is perfect for resting the model on when gluing on parts. It gives, without bending the hull. Made my first mistake! I glued the top tabs of the stern cladding pieces to the vertical centre keel. Later, I realised that these tabs stand off the keel and are glued to the inside of the keel covering piece shown resting on the clips. This was corrected and they were separated with the judicious use of a scalpel.  The bow section was straightforward. 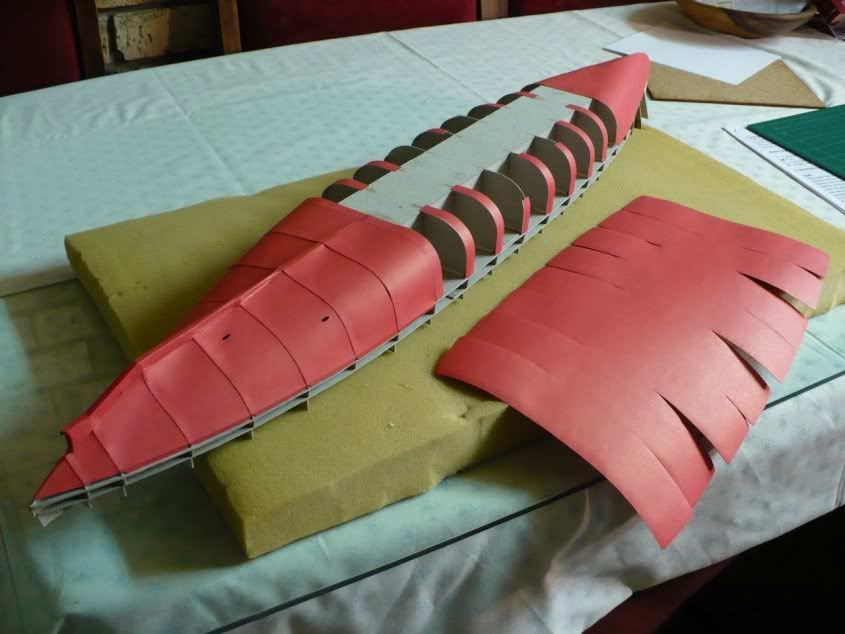 Here is the centre cladding ready to be glued. It was not shown what the shape of the propshaft mounting pillars looked like. At first, I assembled them flat but they didn’t look nice. I managed to get card of the exact colour in a craft shop and made duplicates which were glued with an oval profile. This looked much better. The prop shafts were made using the same card (which had the colour going right through it). I cut strips and rolled them up tightly, gluing lengthwise as I rolled them. When dry, they were sanded down to the correct diameter and I wet my fingers and rubbed a coating of PVA over them and left them to dry. As you can see, they kept their colour. 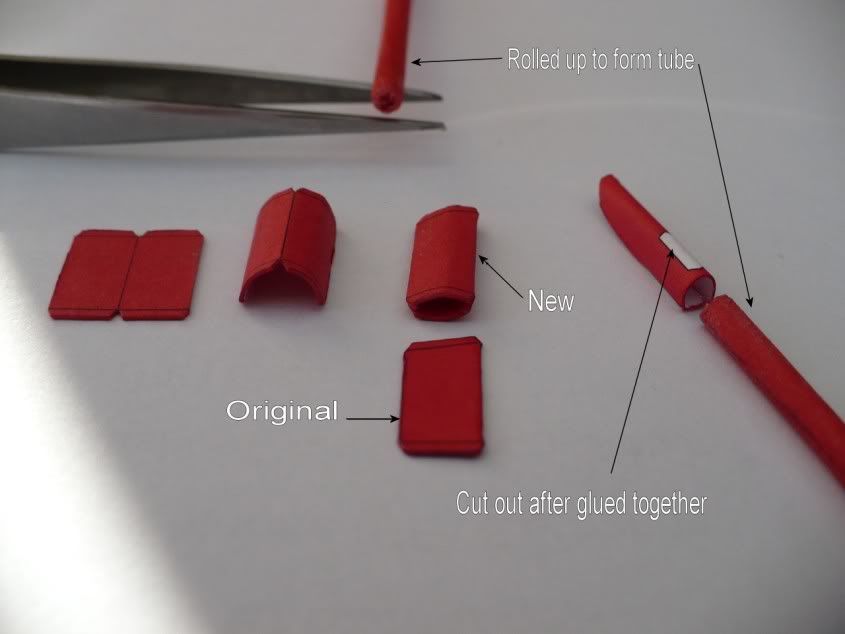 
|
|
|
|
Post by Mike B on Apr 28, 2008 12:46:18 GMT 1
Sides and decks.Before commencing with the sides and decks, the twenty two 138mm gun positions had to be made. My first attempts were terrible, the gun mounts were too fragile. After some trial and error, I finally decided to clad the gun mountings with 0,5mm edging veneer (the kind you use to edge chipboard). Pay attention to the grain direction for trimming when dry. This allowed me to make the gun barrels elevate using 1mm brass rod as the pivot. 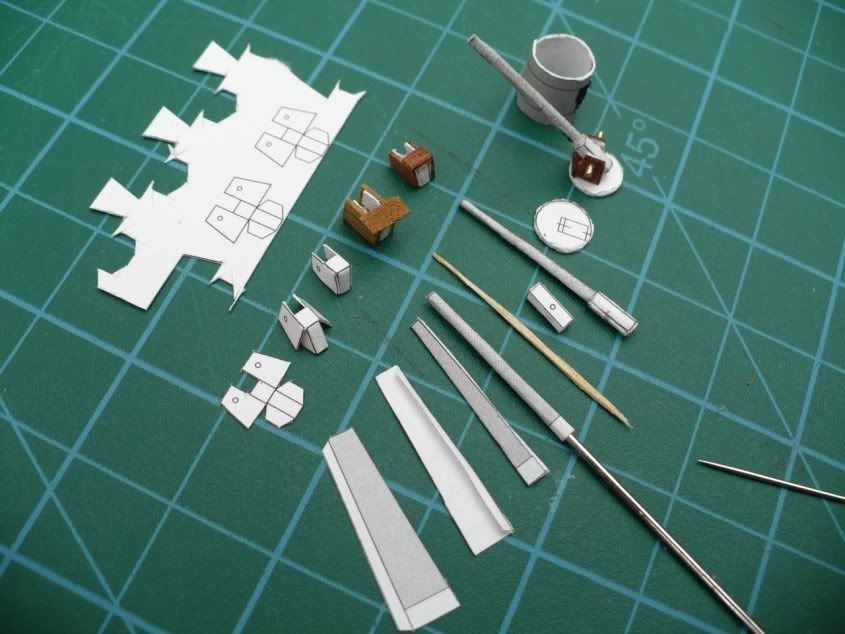 The barrels were also difficult to form. I eventually solved this by folding them flat, smearing PVA glue along the tab, gluing the overlap, wait about a minute for the glue to grab and then inserting a thick sewing needle and rolling the barrel around it to form the shape of the barrel. This came out well. When the barrel was dry, I shaved a thin sliver of wood from a toothpick, coated it with PVA and “screwed” it into the barrel from the rear, stopping short of the outer end so it looked hollow. The barrel was then “rolled” between a sanding block and sanding stick to give it it’s finished shape. 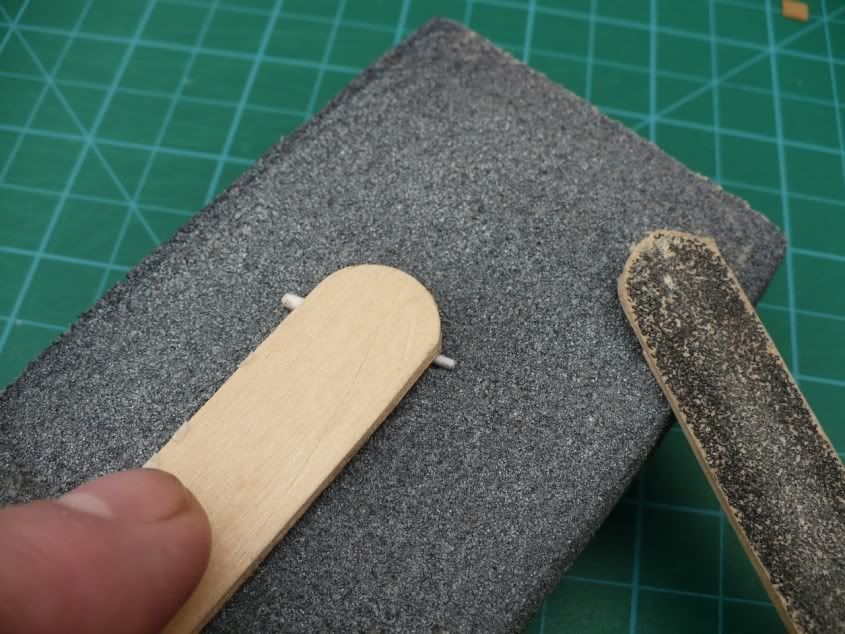 The breechblocks of the barrels were filled with PVA and the barrels inserted. When dry, these were drilled with 1mm holes to accept the brass rod pivots. 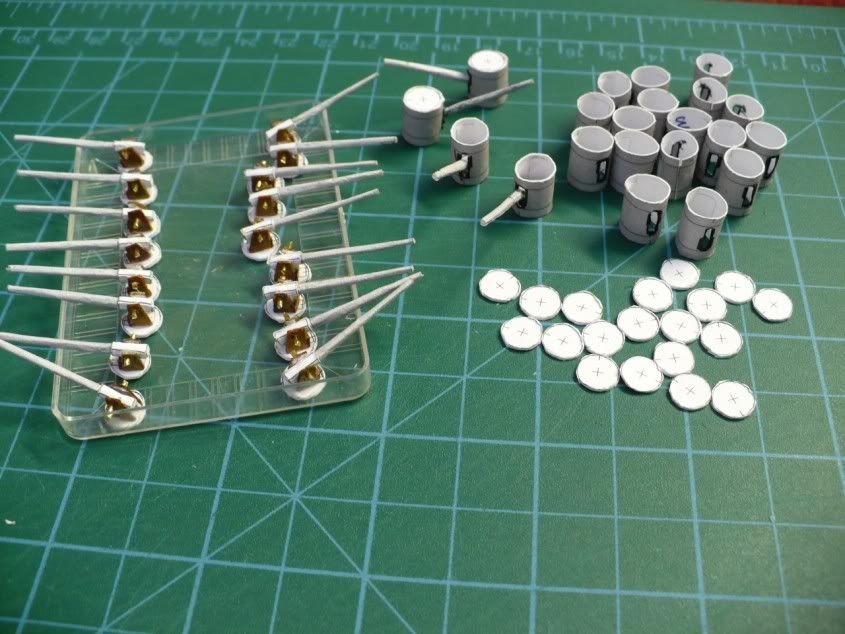
|
|
Deleted
Deleted Member
Posts: 0
|
Post by Deleted on Apr 28, 2008 12:48:43 GMT 1
Looking good, But think I'll stick to wooden ships.  |
|
|
|
Post by poulw on Apr 29, 2008 6:21:37 GMT 1
Hi Mike,
I am following your build with interest, and it is looking amazing so far. Never seen a cardmodel grow before.
During your build, I've come up with the idea, that it must be a relatively cheap and easy way to get a "kit" of a large scale model. This could be something of a hybrid in between card, kit, and scratchbuilding. Ie. if, instead of using card, you cut all the support structures for the hull in eg. 2-3mm plywood, undercut by 1mm all around, you could then plank with 1mm timber strips. And for parts and superstructure, you could use thin styrene sheet, again instead of card. Some items like the gun barrels could still be card.
Now, I have never built a cardmodel, so I don't know if it the idea is feasible or not, but I know that a lot of people cannot find the model they want as a kit, but it may exist as a cardmodel.
It would be interesting to hear your thoughts on this one.
BTW, I bought myself the Richelieu cardmodel for my build, but I am only using it as an extra "drawing" showing all the small details that are blocked out of view on my plans.
|
|
Deleted
Deleted Member
Posts: 0
|
Post by Deleted on Apr 29, 2008 7:19:40 GMT 1
Interesting idea poulw, never thought of using a card model as templates for wood. |
|
|
|
Post by Mike B on Apr 29, 2008 19:27:55 GMT 1
Hi Mike, During your build, I've come up with the idea, that it must be a relatively cheap and easy way to get a "kit" of a large scale model. This could be something of a hybrid in between card, kit, and scratchbuilding. You read my mind Poul. When I was making the gun barrel mounts, It would have been easier to just make them out of a piece of wood with a slot cut in it but I was determined to make as much of the model out of card as possible, so that it was a true card model. The card parts and drawings are indeed, basically a set of plans to scale of 1:200. When it arrived, I realised that I could scratch build the ship by scanning the parts before using them and then use the scans as templates for the ribs, decks etc. The larger gun barrels can be turned from dowel. A drill press is great for doing this using a sanding stick! The small gun barrels from panel pins or pratley putty rolled out before it sets! Once I've finished my other models, I might scratch build the Courbet using the plank on frame method. The card model is perfect for the colour scheme and showing the shape of the various superstructure and fittings. |
|
|
|
Post by Mike B on May 6, 2008 16:15:50 GMT 1
I also wanted the 138mm gun turrets to swivel. The instructions say to put pins in the centres of the top and bottom of the turrets to enable them to swivel but this would have been a mission to align the deck when gluing it over the turrets. A far easier and simpler solution was to make a “cage” from thick card around the rear of the turret. This worked great and the turrets swivel perfectly. 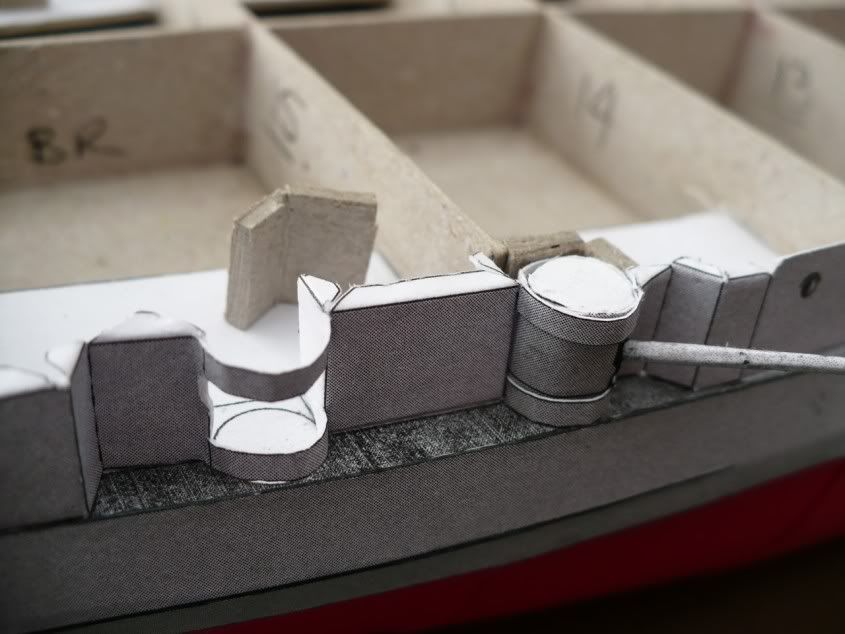 I am also beginning to find that some parts need “tuning” to fit. The bands around the turrets nearest to the centre of the ship on both sides were not long enough and I had to make new ones from one of the spare pieces of coloured card supplied. Also, the frames under the rear deck came flush to the edge of the deck but the frames under the forward deck were not wide enough so the deck overhung the frames along each side. The hull sides were supposed to glue to the frame edges and the deck edge and finish level with the top surface of the deck. This was solved by gluing small squares of card against the frame edges to bring them flush with the edge of the deck. The hull sides were then glued to these packing pieces and the deck edge. Here is the completed hull with first deck in place forward. 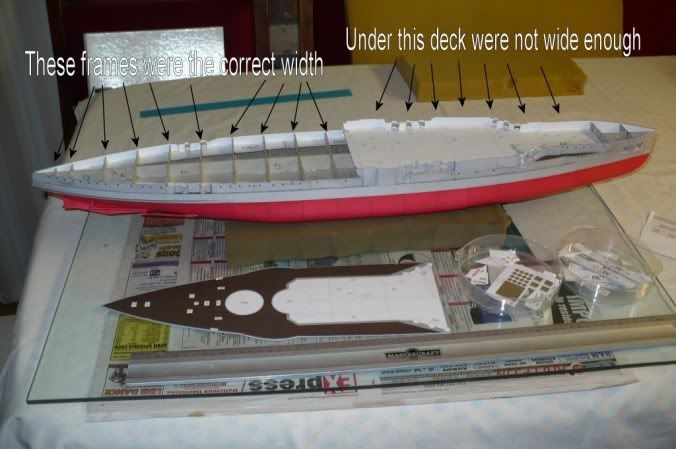 Normally, I assume the deck should go on first and then the sides are glued to it and the supporting frames. On this model however, because of the 138mm gun turrets recessed under the decks, the side pieces have to go on first and then the deck fitted afterwards. Lower deck 138mm gun turret positions 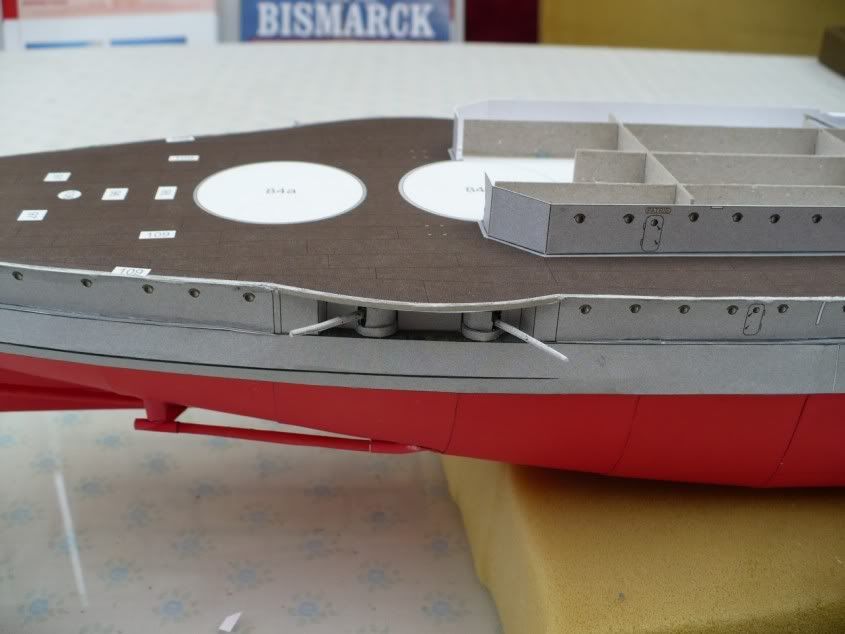 Upper deck 138mm gun turret positions. 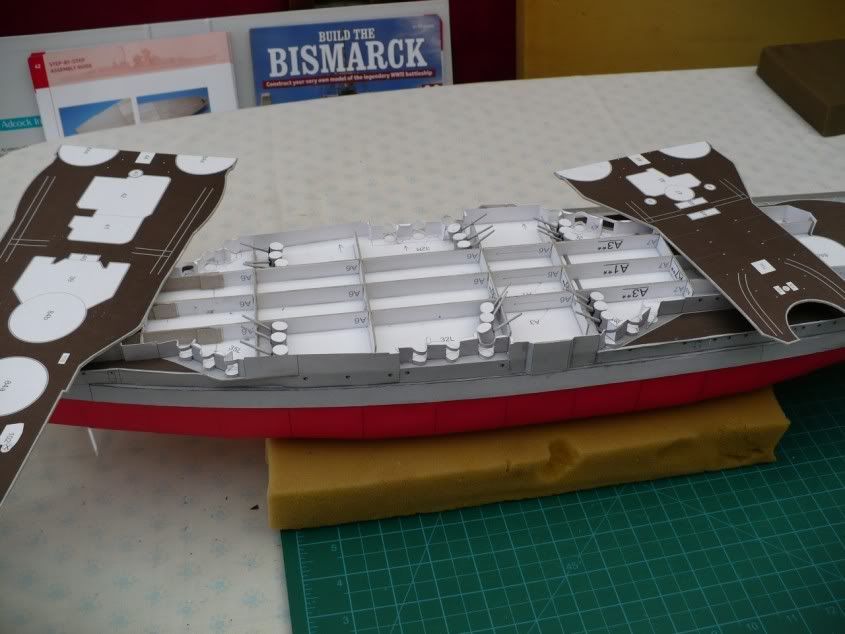 Upper deck gun cages. 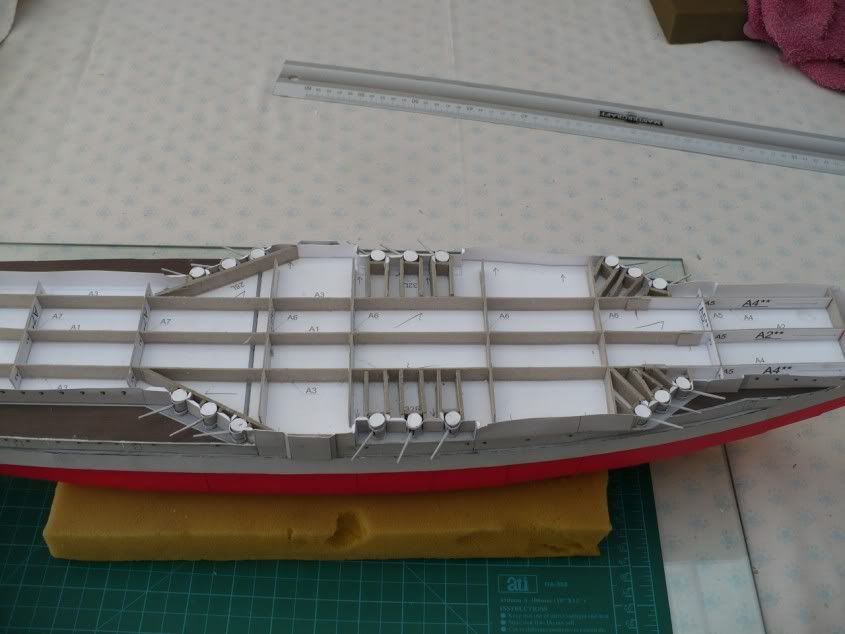 The decks were such a tight fit that they had to be “sprung” into position. This was done by bending the card decks along the centre axis to give a serious camber to the decks. This meant that the deck width was then less than the distance between the sides. PVA was then applied to the deck supporting frames and hull side edges and the deck sprung into place. The deck was then weighted with food tins to flatten it so that it fitted against the sides and was in contact with the supporting frames underneath. 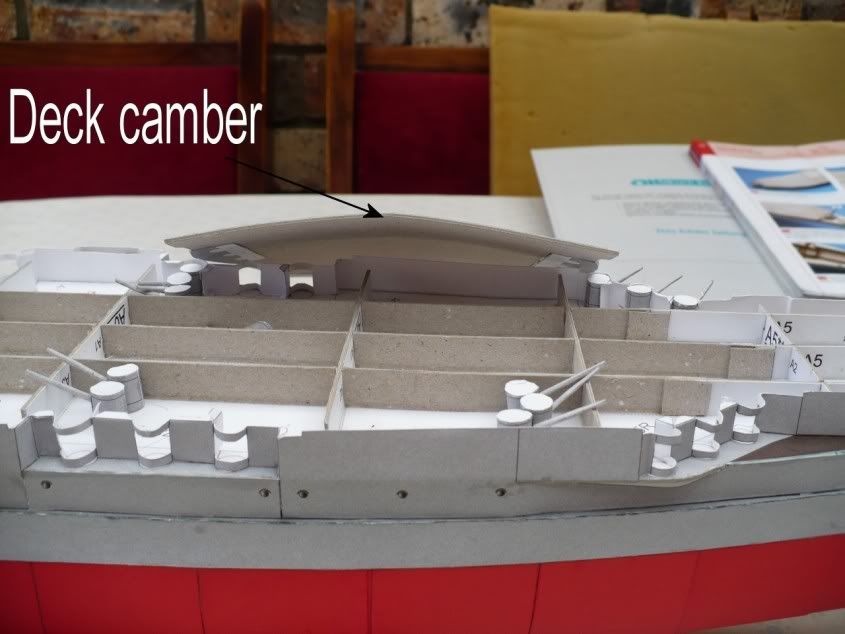 Here is the fore deck fitted. 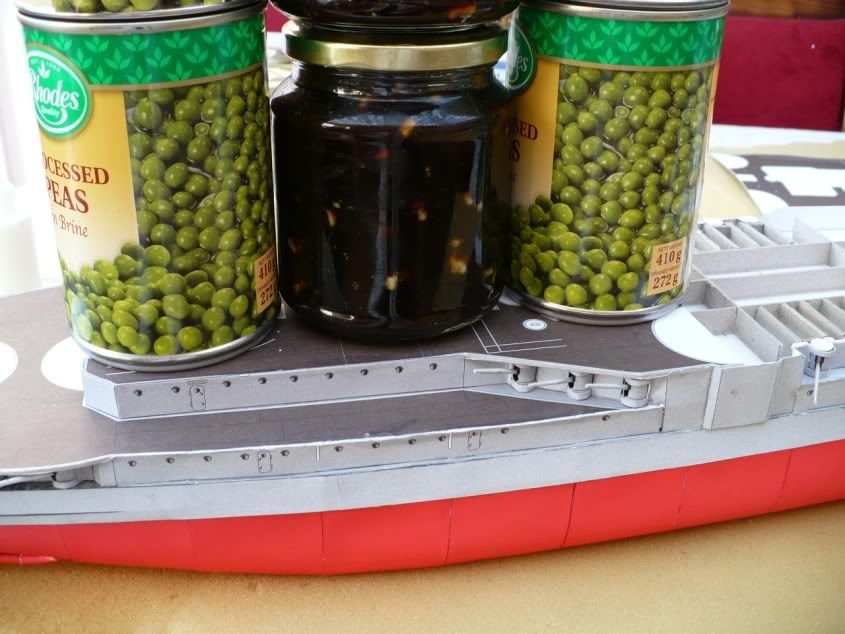 And finally, the completed hull. 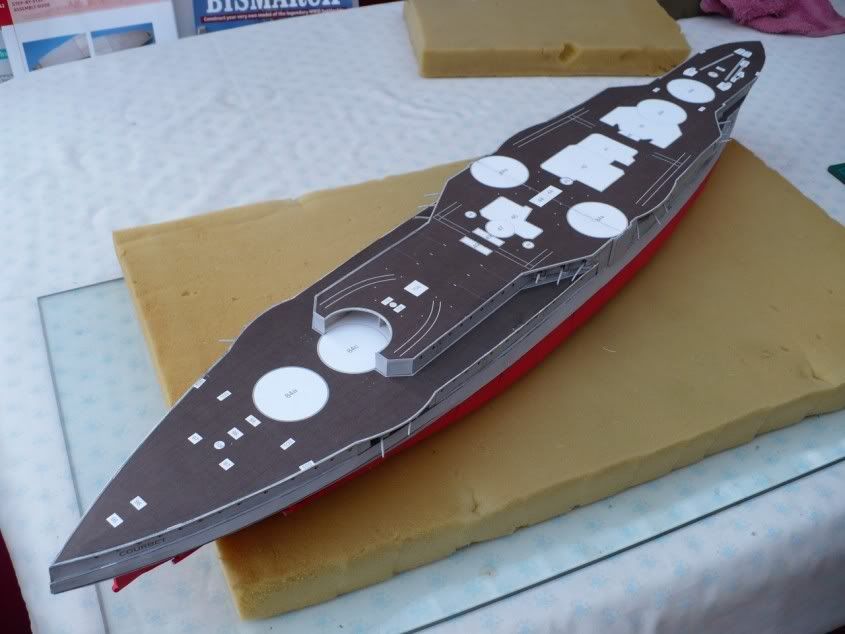 I have come to the conclusion that card modellers are masochists! |
|
|
|
Post by nm on May 6, 2008 16:41:57 GMT 1
Great!
When will your Dad See it?
NM
|
|
|
|
Post by nemesis on May 6, 2008 16:55:35 GMT 1
Looks like you've been really going at it on this model, judging by the amount of progress in such a short time. great work, mate.
|
|
|
|
Post by Mike B on May 6, 2008 19:04:19 GMT 1
Great! When will your Dad See it? NM He will be 86 on 29th June - should be finished by then at current rate of progress. |
|
|
|
Post by Mike B on May 10, 2008 21:01:21 GMT 1
Here is a comparison with the Bismarck - both to a scale of 1:200  |
|
Deleted
Deleted Member
Posts: 0
|
Post by Deleted on May 11, 2008 1:48:35 GMT 1
Wow thought it was bigger than that, love the note on the wall in the background. |
|
|
|
Post by Mike B on May 11, 2008 14:41:51 GMT 1
It's not that the Courbet is small, it's the Bismarck that's soooooo big!
|
|