Deleted
Deleted Member
Posts: 0
|
Post by Deleted on May 22, 2008 6:04:19 GMT 1
Really coming along now, parts are looking very nice.  |
|
|
|
Post by Mike B on May 22, 2008 22:51:33 GMT 1
Really coming along now, parts are looking very nice. Thanks everyone for the positive comments. It looks so much nicer in the pictures. When you look at the actual model, you can see all the imperfections, warts and all! I might give my dad a picture of the model instead of the real thing. ;D ;D ;D |
|
|
|
Post by Mike B on May 22, 2008 23:28:06 GMT 1
Here is a picture of the cranes mounted. I just have to paint the copper stay wires grey. 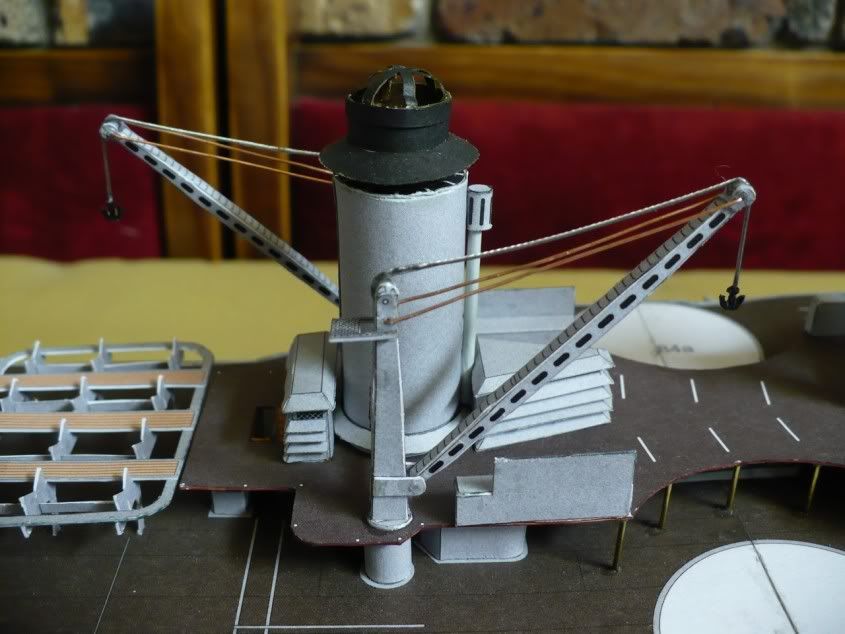 |
|
|
|
Post by nemesis on May 23, 2008 10:50:08 GMT 1
Looking great, Mike.
As for the imperfections, it's the same as with decorating. It's usually only the person who who actually did it that can see them because he knows they're there.
|
|
|
|
Post by nm on May 23, 2008 14:38:48 GMT 1
And Samuel Beckett said something along the lines of: every work of art is a failure, because it doesn't fully capture what the artist had in his mind.
NM
|
|
|
|
Post by eric on May 23, 2008 14:49:51 GMT 1
Yes nm, I can fully understand that sentiment.......when I show my Bismarck or HMS President to people, all I can see are the many small defects, but all they see are the models as a whole and seem to be suitably impressed!
And Mike.....what a fantastic job!
Will you go on to make a scratch wooden version when finished?
|
|
|
|
Post by poulw on May 23, 2008 15:21:53 GMT 1
With a hook without any weight, how did you make the perfect bend on the wire?
Did you PVA glue the thread?
|
|
|
|
Post by Mike B on May 23, 2008 21:16:28 GMT 1
Will you go on to make a scratch wooden version when finished? I have got the Danmark and Victory on hold. I will concentrate on them, and of course, the Bismarck. Maybe, when I get rid of my backlog and the kids stop saying, "dad, are you busy?", I will have a go! |
|
|
|
Post by Mike B on May 23, 2008 21:39:38 GMT 1
With a hook without any weight, how did you make the perfect bend on the wire? Did you PVA glue the thread? I had some plastic coated wire thingamebobs that my wife found at work. They were pretty rigid and were bent with longnose pliers and superglued in place. You can duplicate this with 4 or 5 pieces of wire from some thin multi-strand cable, twisted to form a "rope" pattern. If you can't find multi-strand wire, use fuse wire.  |
|
|
|
Post by Mike B on May 23, 2008 22:50:23 GMT 1
I thought that the turrets would be easy because of their size: think again. First, the barrels. After trial and error, I came up with a satisfactory way of forming the barrels. 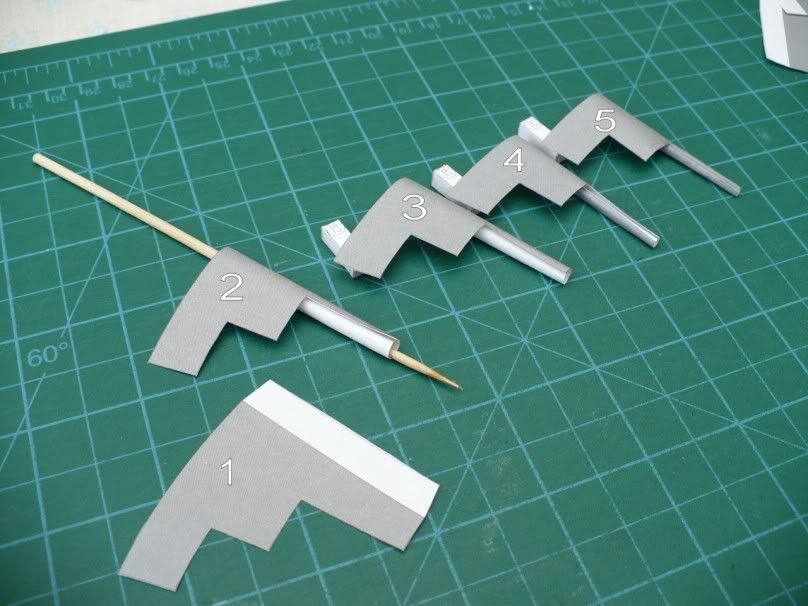 1 shows the barrel as cut from the card. Then, the barrel was rolled loosely around a 2mm skewer or dowel (2 & 3). It was then rolled by hand like a cigarette until the grey overlapped the glue edge and then opened slightly until you can see the glue edge (4). The first stage of the barrel was glued by tacking the end with a drop of PVA (see below). The rest of this portion of barrel was glued (5).  The next section of barrel was glued in the same way, tacking it where shown in red. 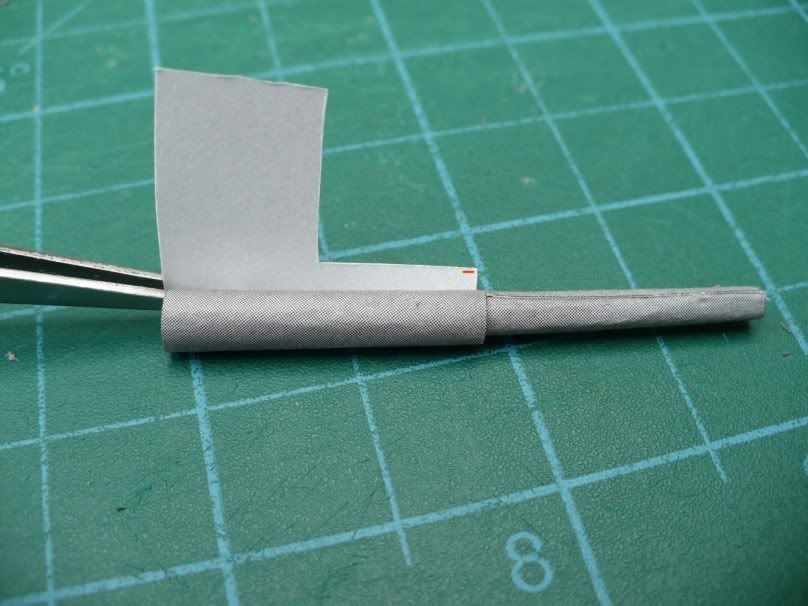 The rest of this portion of barrel was glued, as shown in red. 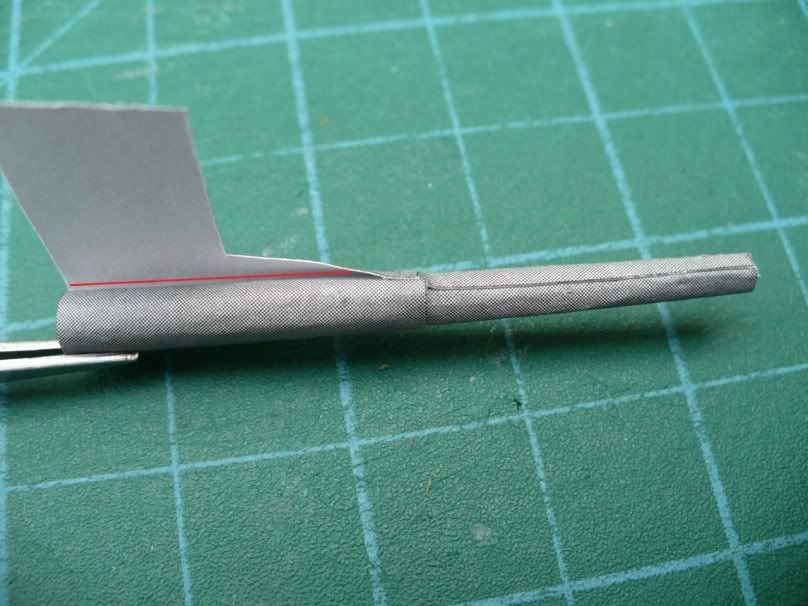 Finally, the last stage of the barrel was glued as shown. 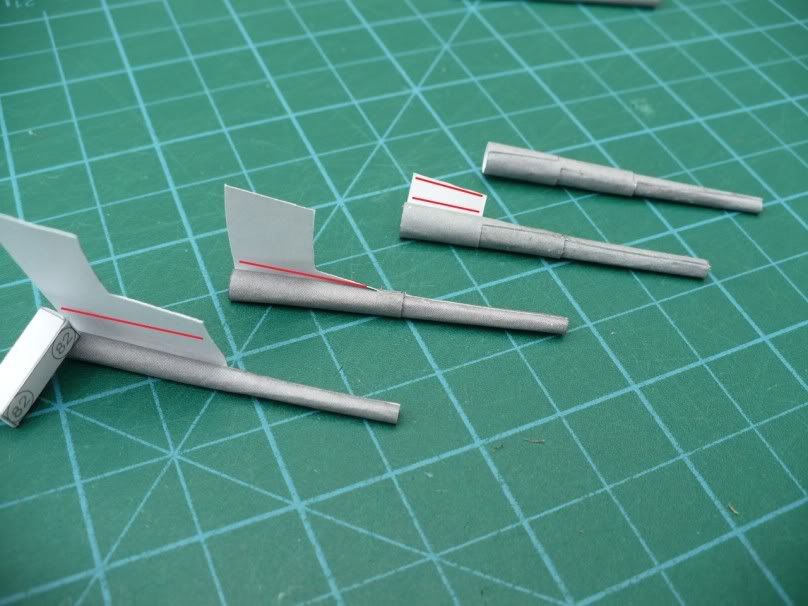 The barrel was rolled and the excess glue squeezed out and caught on the index finger. 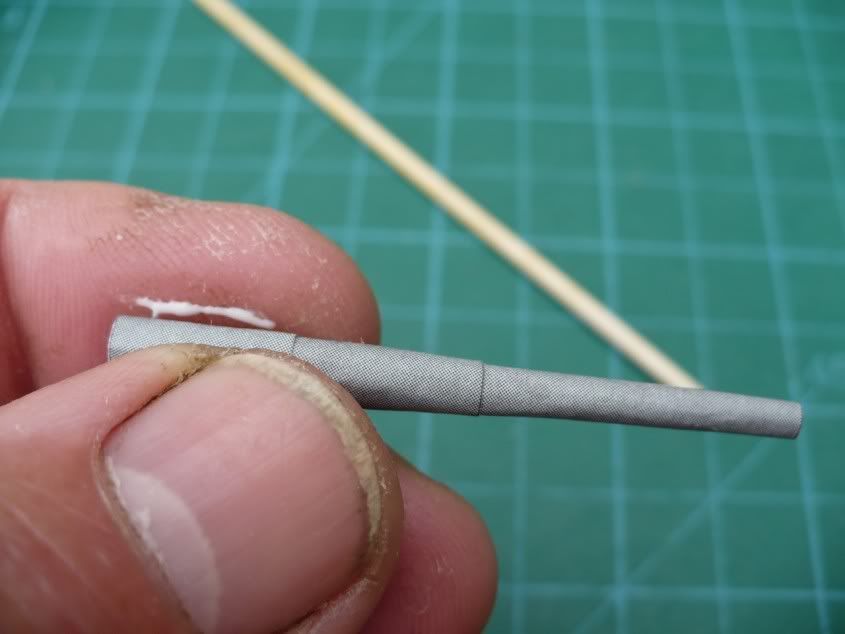 Barrel mounts. The barrel mount was reinforced with some balsa as shown, to provide a more rigid mounting for the barrel locating pin which goes through it. 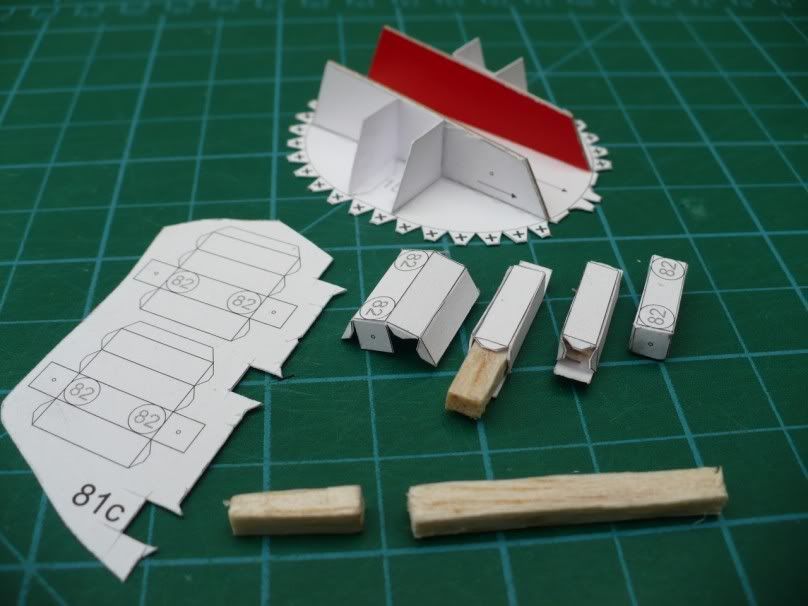 The barrels were reinforced with toothpicks. PVA was squeezed in each end of the barrel and a toothpick “screwed” in from the rear. Some toilet paper was twisted up and used to caulk the base. This was coated with PVA and, when dry, a 2mm hole was drilled in the barrel mounting block and the barrel glued in and the excess toothpick cut off at the rear of the block. 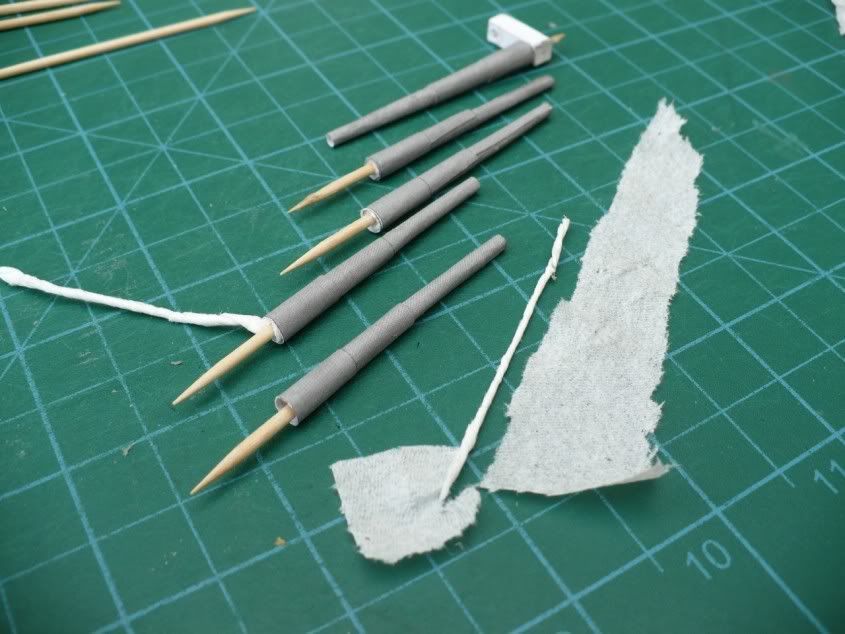 |
|
|
|
Post by Mike B on May 28, 2008 19:03:47 GMT 1
THE STAND I had to make the stand now as the hull had to be inverted and supported on the bow and stern parts of the deck and this had to be done before I could carry on mounting the rest of the deck structures. Here is a diagragm of the proposed mountings. 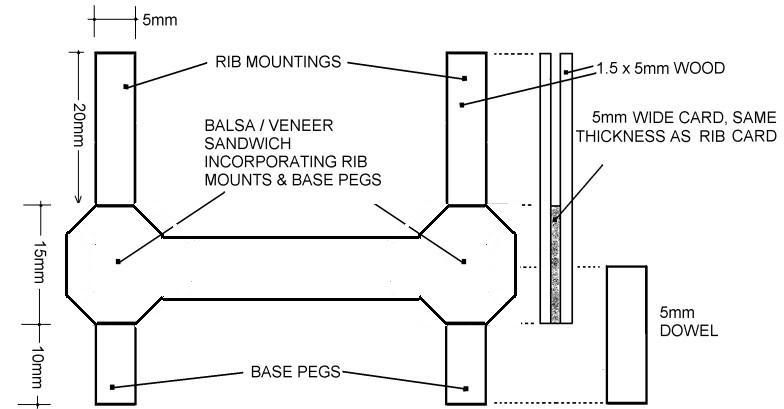 The rib mountings were made first. After the glue was dry, the mountings were sanded and the card portions were soaked with thin CA to stop them delaminating. The ends of the mountings were chamfered like pegs to enable them to fit over the card ribs easily. 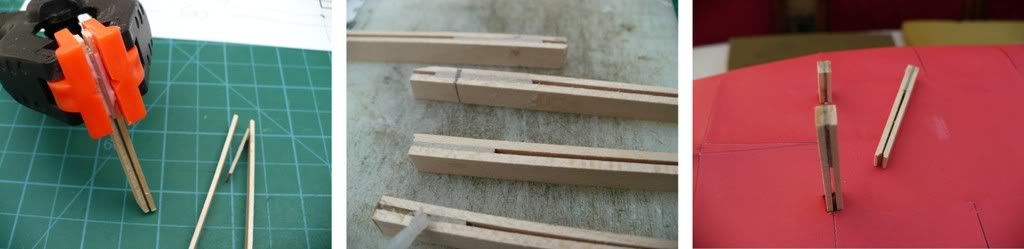 The basic stands were then roughly built up using balsa between the mountings and on each end. When dry, the balsa was sanded down flush with the thickness of the “pegs”. Strips of edging veneer were then glued vertically on both sides of this “sandwich”. 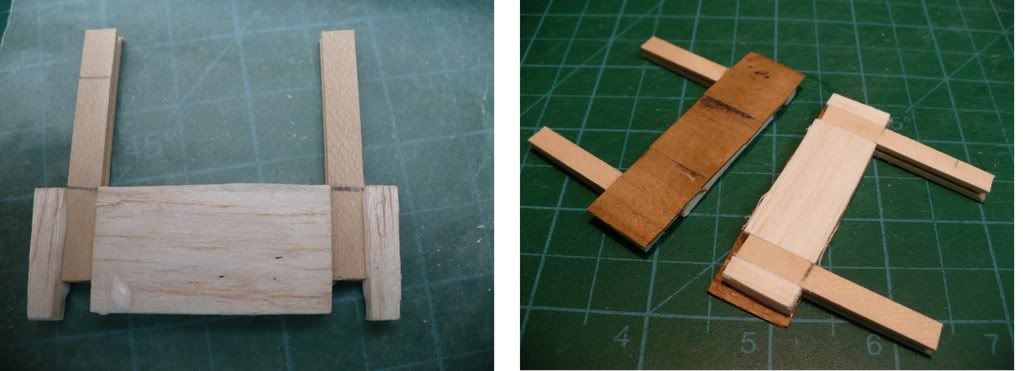 These were then sanded and then the stand trimmed to shape. A second layer of veneer was then glued horizontally along both sides. This was effectively a 1mm plywood coating on both sides. The ends were then covered with a single layer of veneer.  When dry, the assemblies were sanded and then 5mm holes were drilled for the dowels which would fix the stand to the baseboard. 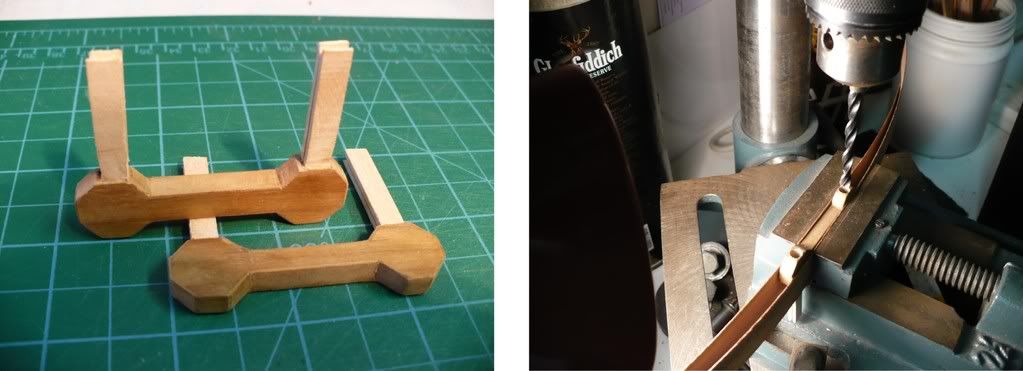 After gluing in the dowels, the stands were given a couple of coats of sanding sealer and then mounted on the hull. This was done by squeezing PVA through the holes in the hull on both sides of the rib and then the rib mountings were pushed over the rib until flush with the hull. 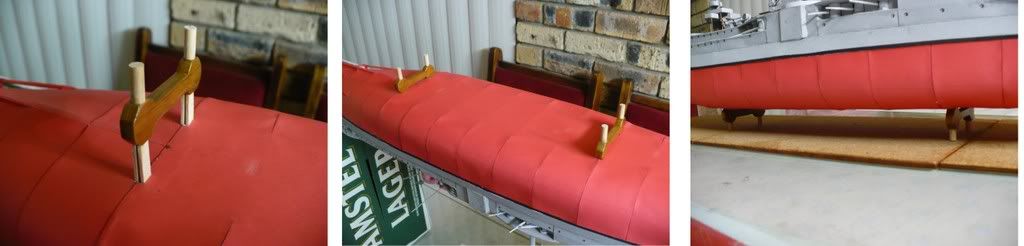 I am actually very pleased with the finished stands. They are small yet functional. |
|
|
|
Post by Mike B on May 30, 2008 10:43:12 GMT 1
Progress to date:- 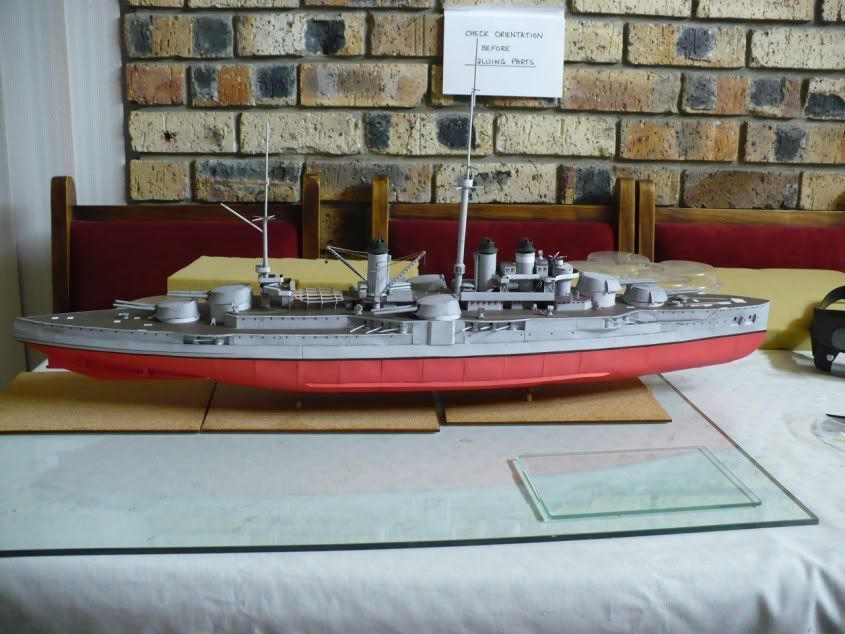 |
|
|
|
Post by nemesis on May 30, 2008 12:13:54 GMT 1
She's really coming along nicely, matey.... and fast, too!
|
|
|
|
Post by rem2007 on May 30, 2008 13:09:32 GMT 1
I have a sign up in the mirror in our tiolet, it says 'Please put brain in gear before opening mouth'  I believe it said it in our old workshop on the ship. |
|
|
|
Post by rem2007 on May 30, 2008 13:11:37 GMT 1
No seriously, nice work their mate! Have a karma!
|
|


 I believe it said it in our old workshop on the ship.