|
|
Post by markus on Apr 13, 2009 9:20:41 GMT 1
hi rod...
decided NOT to use this parts as they're almost impossible to affix
seems they're some kind of wall lamps..
ref the railings:
price is 105 AUD when paying with paypal, shipping via air mail included...
markus
|
|
|
|
Post by rod on Apr 13, 2009 9:47:31 GMT 1
Thanks Markus, that price is a bit steep for me, I might hold off. I did persevere with the little lamps..here is the result.. I'll have to do some research to see if they get painted a particular colour. Looking at the picture I just noticed how much of the detail you can actually see up close. Frightening..  |
|
|
|
Post by rod on Apr 13, 2009 10:05:10 GMT 1
Thought it worth posting an update for the Aussie contingent. I spent the Easter break painting the hull its first real colour coat and put primer on the superstructure photo etch. Its starting to come together now. We have enough issues in Australia now to see it start to come together as it should look. I still have to put the camo striping on but this is the basic look of the hull. A second coat of grey on the upper hull should finish it off before I start to do the black and white stripes.  The forward bridge area looks cool once painted. Here are the before and after shots.   Skyfire, you mentioned you used HB pencil for the inside areas of the bridge. I bought a black permanent marker from Officeworks and coloured it inside first. Its copped a little bit of grey spray but I'll go over it again and it should come up ok.  The gaps between the photoetch walls are a bit too big for me and show up well now that I have the paint on. A bit of filler should do the trick, but its going to be a bit hairy to not get it everywhere and then sand it smooth. Might have to make up a syringe full of filler and squirt it in - anyone got any ideas?   |
|
|
|
Post by Baz on Apr 13, 2009 10:32:36 GMT 1
Looks great Rod,
Good to see us ozzies are willing to air our dirty.........er brassy linen
Have a 'k' matie
Baz
|
|
|
|
Post by Mike B on Apr 13, 2009 19:22:54 GMT 1
The gaps between the photoetch walls are a bit too big for me and show up well now that I have the paint on. A bit of filler should do the trick, but its going to be a bit hairy to not get it everywhere and then sand it smooth. Might have to make up a syringe full of filler and squirt it in - anyone got any ideas? Get a toothpick and profile the edge to a chisel shape. Mix up some car bodyfiller and apply to the gap with the toothpick, smoothing as you go. If done carefully, minimum sanding will be required. Alternatively, cut some slivers of wood and glue them in the gap. |
|
|
|
Post by eric on Apr 13, 2009 21:40:15 GMT 1
hi rod... decided NOT to use this parts as they're almost impossible to affix seems they're some kind of wall lamps.. markus I did fit them, and they damn near drove me insane! The only way to see what I was doing was with a magnifiying glass with lights on it, pointy tweezers, a touch of CA and a LOT of patience! It was almost impossible to tell what way to orientate them, and every now and then one would ping off into space and I would spand the next hour or so on hands and knees (with magnifying glass) looking for 'em! Never again...... |
|
Deleted
Deleted Member
Posts: 0
|
Post by Deleted on Apr 14, 2009 3:24:55 GMT 1
Eeeeeeeeeeks
Now do I add them or not!!!!
|
|
|
|
Post by rod on Apr 24, 2009 7:33:39 GMT 1
Well I've used up all the parts - finally got up to date with all the issues I have. Strange collection of left over brass parts I have. So who can resist painting their baby once its ready... I couldn't  I'm going for the camo just before operation rheinuburg. This photo here seems to best depict the Bismarck in the colours I'll be using. 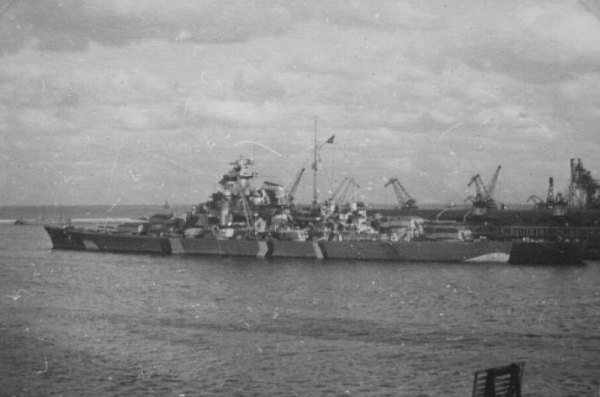 My version so far.. 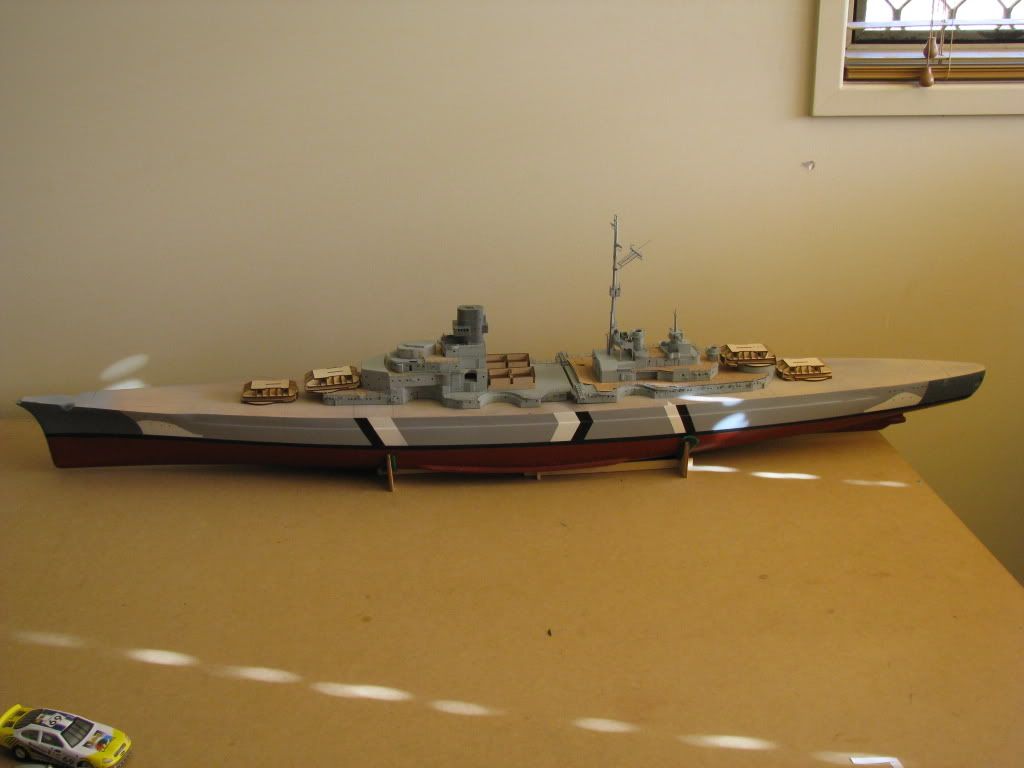  cheers Rod |
|
|
|
Post by swanrail on Apr 24, 2009 23:51:01 GMT 1
Camouflage looking very good Rod, coming along nicely, well done!
|
|
|
|
Post by rod on Apr 26, 2009 2:25:35 GMT 1
The mod that Baz mentioned is well worthwhile. Keep those ideas coming Baz. I'll award you the realism hunter award... The eyebrow over the upper bridge is easy and brings a bit of life to an otherwise bland looking bit of structure. Also the bracing for the ammo hoist - definitely required..  cheers Rod |
|
|
|
Post by Baz on Apr 26, 2009 5:20:31 GMT 1
Great work Rod ......  I'm going out to the shed now to see if I can find something thin enough to use for the other 2 ammuntion hoist supports. Its damn cold, wet, very windy and just plain miserable down this way today ...............  Won't be out there for long Might even be forced to watch the motorbike racing and the ANZ netball championship. Big game. ...................  Kiwi's (Magic) v Aussies (Firebirds) ....... kamate, kamate. Baz |
|
|
|
Post by rod on May 19, 2009 22:29:18 GMT 1
I'm still progressing with my first turret. These are not for the feint hearted. I found it really difficult to match the brass up. Anyway here are some shots with the first undercoat: 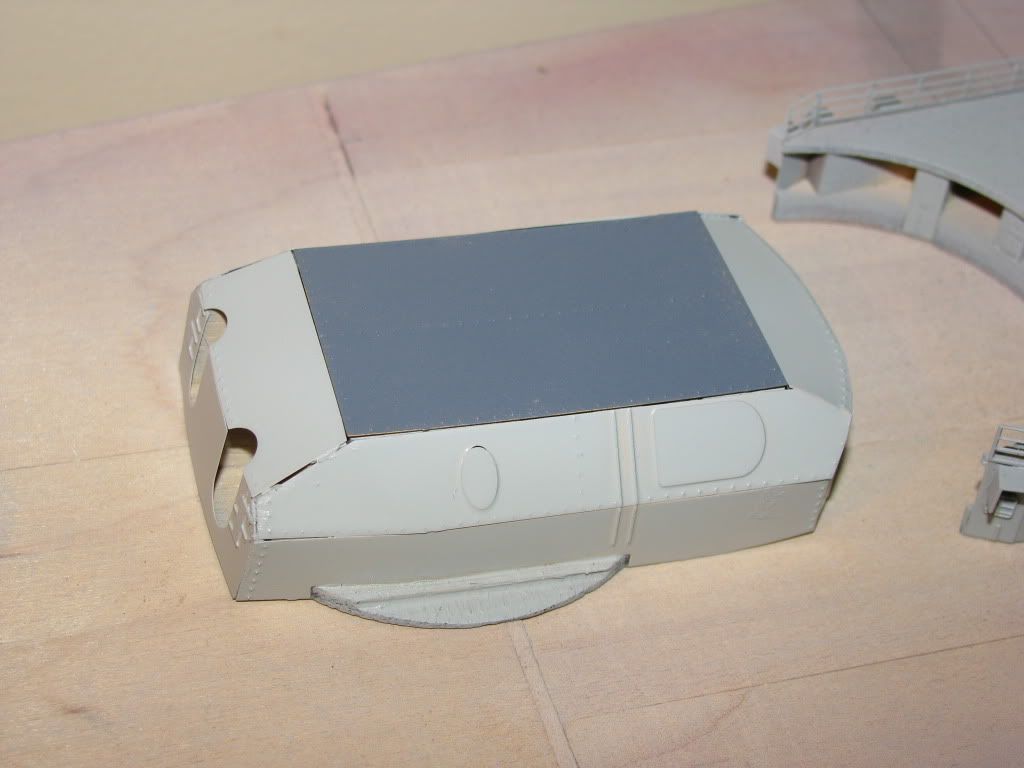   I like to apply an undercoat to the metal first and the take some close up shots. In particular with the turrets, this will show up the imperfections that I have to fill and sand. Its also shown I have to sand the wooden sloping bit I cut out, much more. Its not really noticeable when viewed with normal eyesight, but in close ups with cameras, the wooden part looks furry. I haven't glued down the roof yet, so its just sitting loose on top. It looks like it should be a reasonably good fit. In another forum I did see someone who had soldered together the entire turret and did away with the wood frame. Having done my first one, I can actually see some merit in that, if only to get the seams to line up perfectly instead of having to sand and file the wood frame to make it that way. Hopefully I can get another turret done this weekend. cheers Rod |
|
|
|
Post by nm on May 19, 2009 23:08:44 GMT 1
It's coming on well.
nm
|
|
|
|
Post by rod on Jul 20, 2009 4:19:55 GMT 1
Isn't it funny how several months go by and you don't seem to make much progress. I'm slowly getting the turrets done. The decking was a welcome addition, if only to make the boat look a bit more real. But the real news??? <---------------- New Avatar!!!!  Yeah its a dirty workplace, but I've sacked the work gang as they weren't performing, so the place has fallen into a shambles. But never fear, I have some dibs on a new work crew that may improve things a little bit. They have a.. er .. unique management style. I'll introduce them when they come on board... just a few contractual issues to iron out. aarrgghgahahh me hearties.. Rod |
|
|
|
Post by tanus on Jul 20, 2009 4:55:11 GMT 1
Hi Rod,coming along well.If u use stop putty from autobarn,you can fill your turret gaps,and it will come off with meths,so any you get arround your rivets you can take off,without ruining any detail.You can also fill if u like with stretched spru.
Looks good with the decks,im still waiting for mine.
Being from Brisbane,are you going to the QMHE,in August.
Tanus.
|
|


 I'm going for the camo just before operation rheinuburg. This photo here seems to best depict the Bismarck in the colours I'll be using.


