|
|
Post by southendnick on Mar 20, 2008 0:04:10 GMT 1
I have taken the plunge and orded the kit, First lests start with the magazine, An informative rwad and some truely stunning pictures. The Kit Issue 1: Nothing to put together with the first issue, parts included the Date Stamped Base Plate parts (2) Issue 2: Again nothing to do with the second issue, parts recived include, The Sun (no not the newspaper so no Page 3 girls  ) Column, Drive Shaft, Grub Screw, Aleen Key Screws (3) & The Column Support. The build dose not start intill Issue 4 this will see the first phase completed with the main central section done in one hit, The second phase is attaching the drive cogs and planets, The third and final phase is fitting the motor drive and speed controler. Will post some photos over the next few days. Issue two weighs a ton! |
|
|
|
Post by Mark on Mar 20, 2008 3:26:23 GMT 1
I've got mine on subsciption. However, it's being delivered to the UK, so I'm not going to get my grubby little paws on it for ages yet. Frustration at it's best  Looking forward to seeing how yours goes together Nick |
|
Deleted
Deleted Member
Posts: 0
|
Post by Deleted on Mar 20, 2008 3:54:24 GMT 1
I'm still waiting for it too arrive in Aus. |
|
|
|
Post by southendnick on Apr 4, 2008 23:51:28 GMT 1
We actually get to start building with issue four that I picked up today so from the start... The Issues so far: 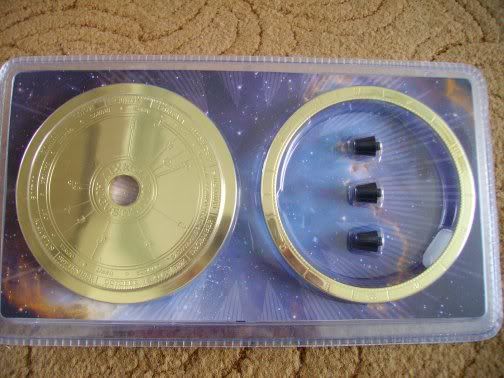 Issue 1 parts Issue 1 partsBase Plate, Date Plate Feet 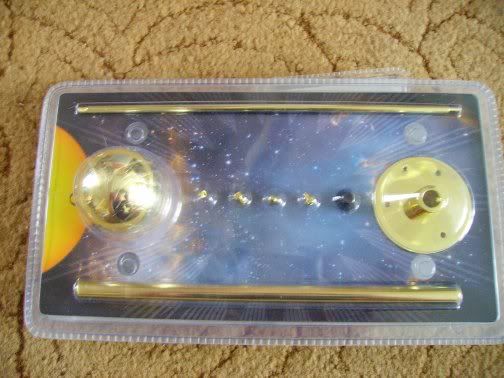 Issue 2 parts Issue 2 partsCentral Column, Drive Shaft, Central Column Support, Screws, Grub Screw  Issue 3 parts Issue 3 partsGear Set 1 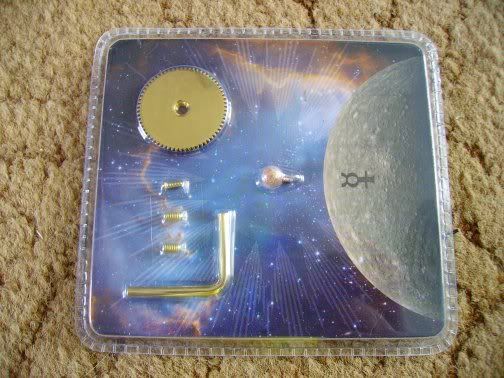 Issue 4 parts Issue 4 partsMercury, Planets arm, grub screws The Build (Stage 1)The build starts with the column suport being attached to the underside of the engraved base plate it is attached with three key screws you have to be carefull in lining up the two as there is a forth smaller hole that also needs to be inline.  Getting the bits ready The next stage was to attach the three nylon feet, The first two stages complketed. Next up was attaching the central column, it sits flush with the underside of the base plate and is held in place by a 2mm grub scre (Dont drop it!)  Central Column in place. Next stage is to attach the Sun to the drive shaft and then attach the first of the cogs this is a 55 tooth butressed gog held in place by a 1.5mmgrub screw (they are getting smaller!) The next step was to attach the first of the planets arms again a 1.5mm grub screw hold it in place (NOTE: its a bit of a tight fit and my alen key got stuck in the hole luckly a bit of wiggling finally got it free)  The Sun, cog and planet arm in place. Offically the next step was to attach Mercury but I skipped the stage and dicided to leave the planets untill the last thing of this segment of the build just so that it was not knocked out or anything. The next step was to put together the first of many gear sets, a falirly simple task. 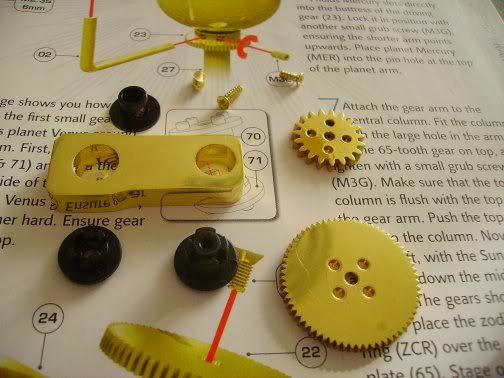 From lots of little parts... 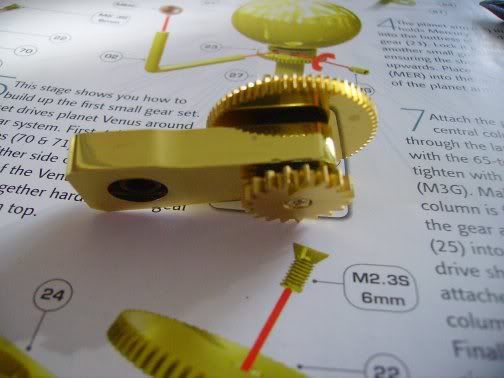 The screws that hold the cogs/gears in place are a very tight fit so I advice to screw them in to the gears and remove them before you assembe it as one slip will scratch the brass pieces. This piece is located at the top of the central column once in place you slide the drive shaft inside and complete the first stage of the build. 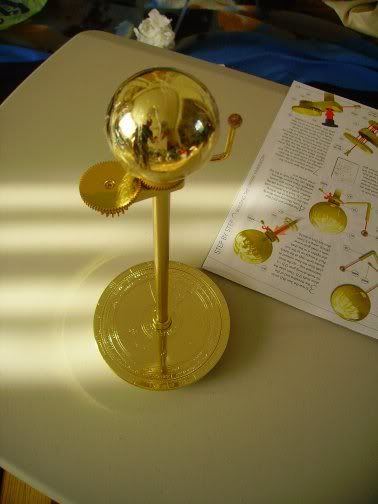 How it now looks with a billion or so more cogs gears and arm to add! |
|
Deleted
Deleted Member
Posts: 0
|
Post by Deleted on Apr 5, 2008 0:15:37 GMT 1
Looking good, can't wait for it too appear down under.  Oh btw you seem to have image 5 twice and missed out number 6 The next stage was to attach the three nylon feet, <-- has image 5  |
|
|
|
Post by nm on Apr 5, 2008 2:15:13 GMT 1
Now you're making me sorry I didn't get it.
Good advice on scratches - easy to be wise AFTER the event.
NM
|
|
|
|
Post by paulhbell on Apr 5, 2008 12:05:29 GMT 1
Nice to see that someone is making a build thread for this. I thought about starting a thread, but thought that everyone's solar system is going to be the same.
Keep it up. Nice to see someone else's photos.
|
|
|
|
Post by southendnick on Apr 5, 2008 22:58:51 GMT 1
The missing photo...  I wish I could say I had a drink or two when post but I had not so hands up I ballsed up. |
|
|
|
Post by Mark on Apr 7, 2008 15:19:23 GMT 1
That's looking smart Nick. It's all nice and bright and shiney. My issues 2 & 3 have arrived at my folks home, but it's going to be a while before I get my grubby mits on them. Your photos are convincing me I haven't wasted my money  |
|
|
|
Post by Mark on Apr 7, 2008 15:20:42 GMT 1
PS - Could you get a close up photo of Mercury ? Looking forward to the next installment |
|
|
|
Post by viking on Apr 7, 2008 23:40:14 GMT 1
looks good but not my cup of tea it would sink and get all dull and scratched will be impressive when finished good luck
|
|
|
|
Post by southendnick on Apr 9, 2008 23:11:25 GMT 1
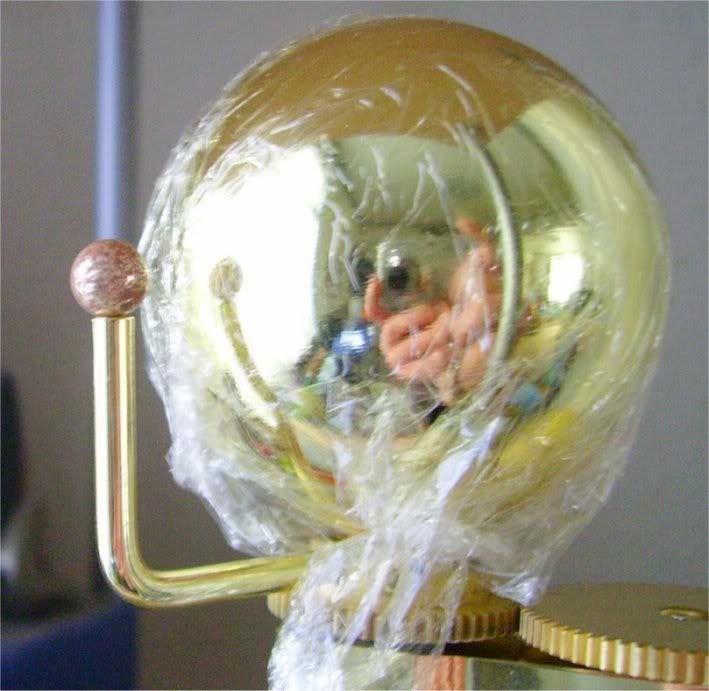 Mercury & The Sun... And my hands with camera! I hace dicided to leave the protective wrap on the sun untill I finish the build. |
|
|
|
Post by Mark on Apr 10, 2008 0:00:26 GMT 1
Thanks Nick. It looks very nice indeed. Only another 11 months to go |
|
|
|
Post by southendnick on Apr 11, 2008 11:08:12 GMT 1
Issue 5 is niw out more gears and no more build untill issue 7.
|
|
|
|
Post by southendnick on Apr 25, 2008 18:01:30 GMT 1
I had hoped to start the second stage of the build (issues 5-7) with issue 5 you have to build the gear set sandwich for Venus, this is done by conecting a 39 tooth gear (No34), a 41 tooth gear (No28) Gear collar (No31) and Gear spindle (33). This is slid on to the main column and held in place by a 5mm grub screw however,
It is impossible for the grub screw to grip the central column as the plastic Gear spindle dose not have a hole in it to let the grub screw through to grip the central column.
So I have fired an e-mail off to Eaglemoss to ask for HELP!
|
|

 ) Column, Drive Shaft, Grub Screw, Aleen Key Screws (3) & The Column Support.